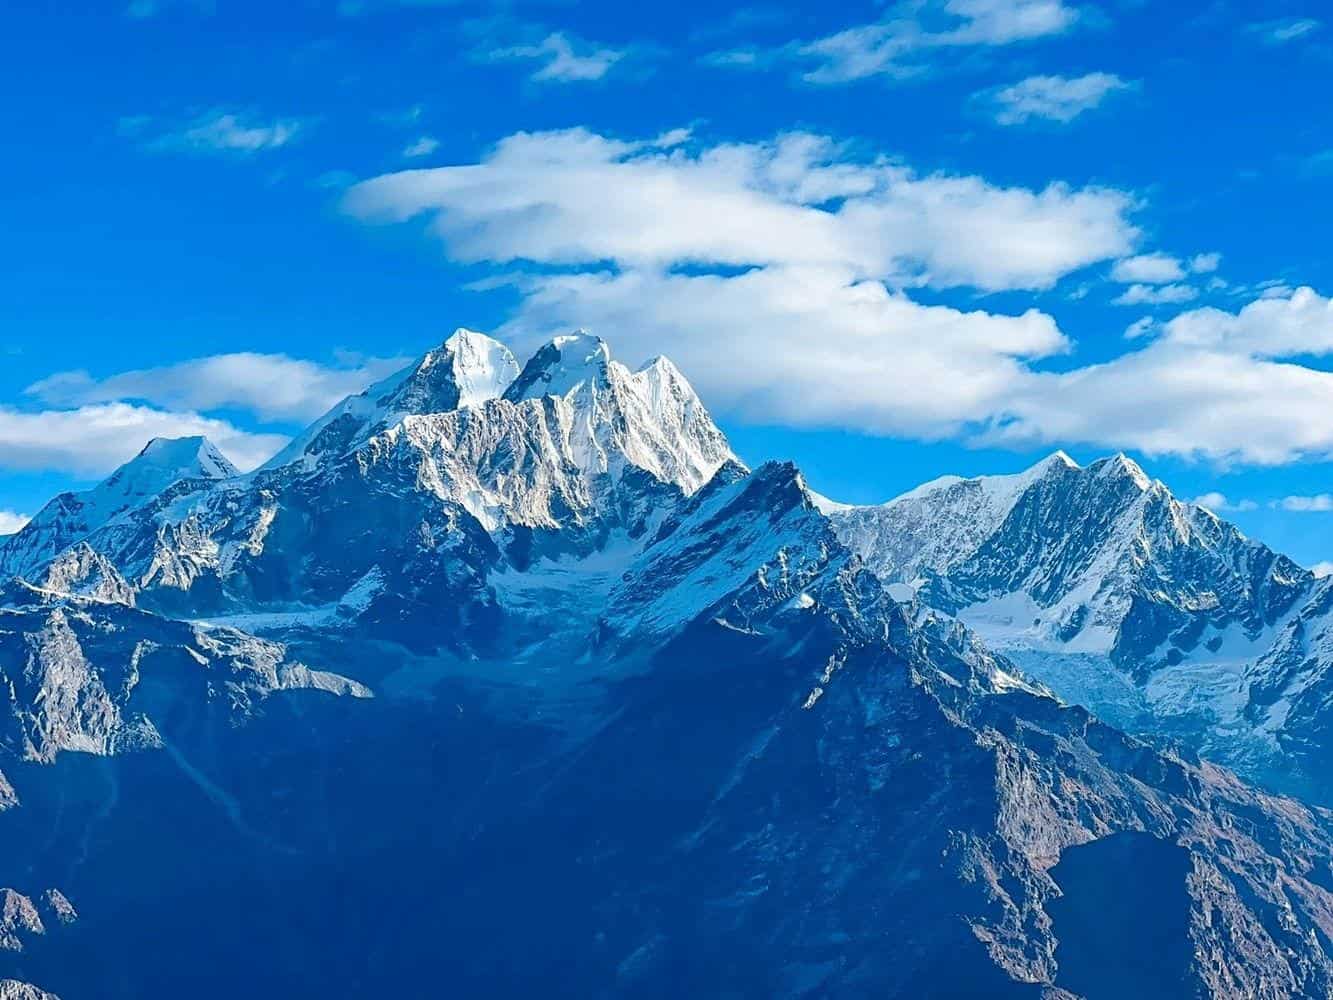
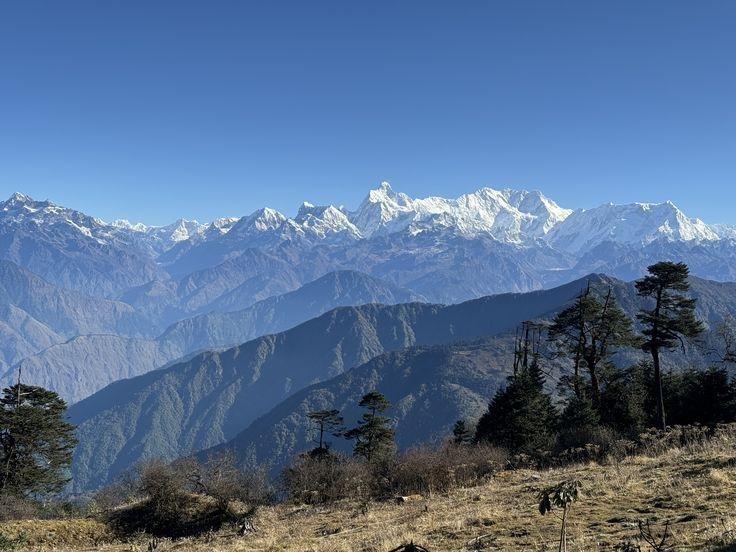
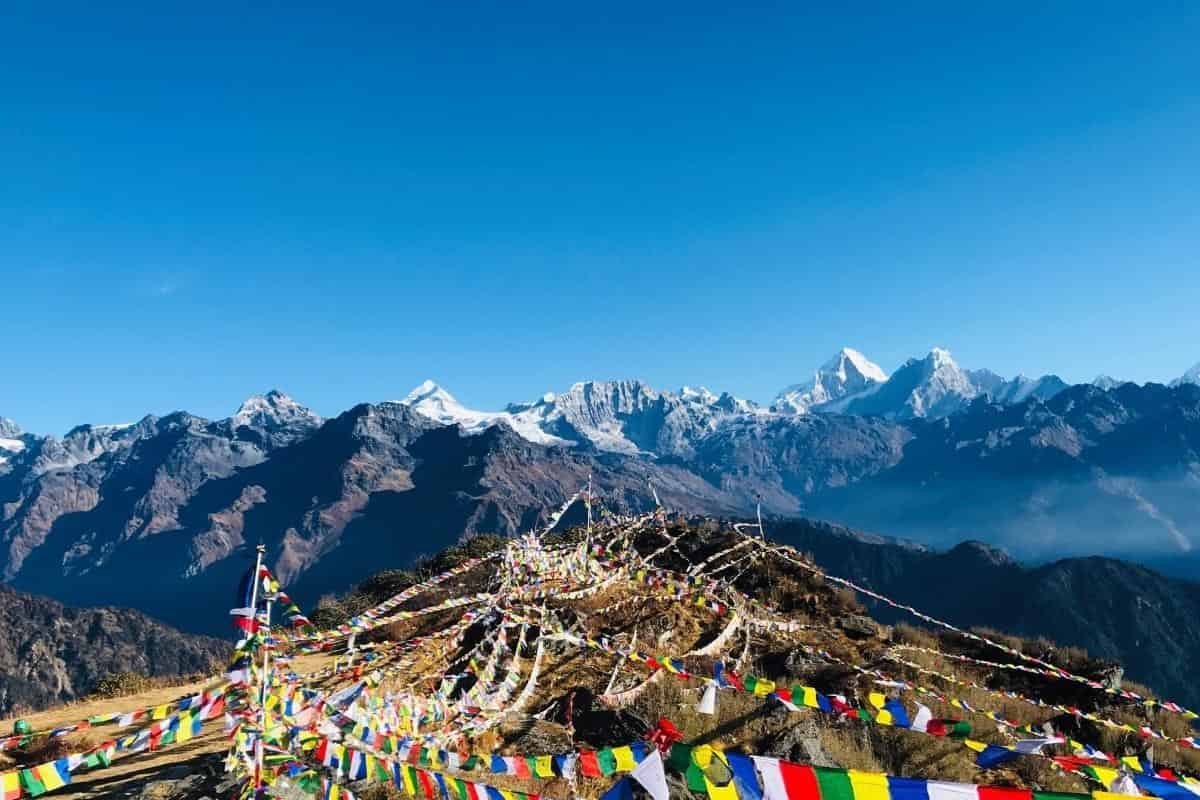
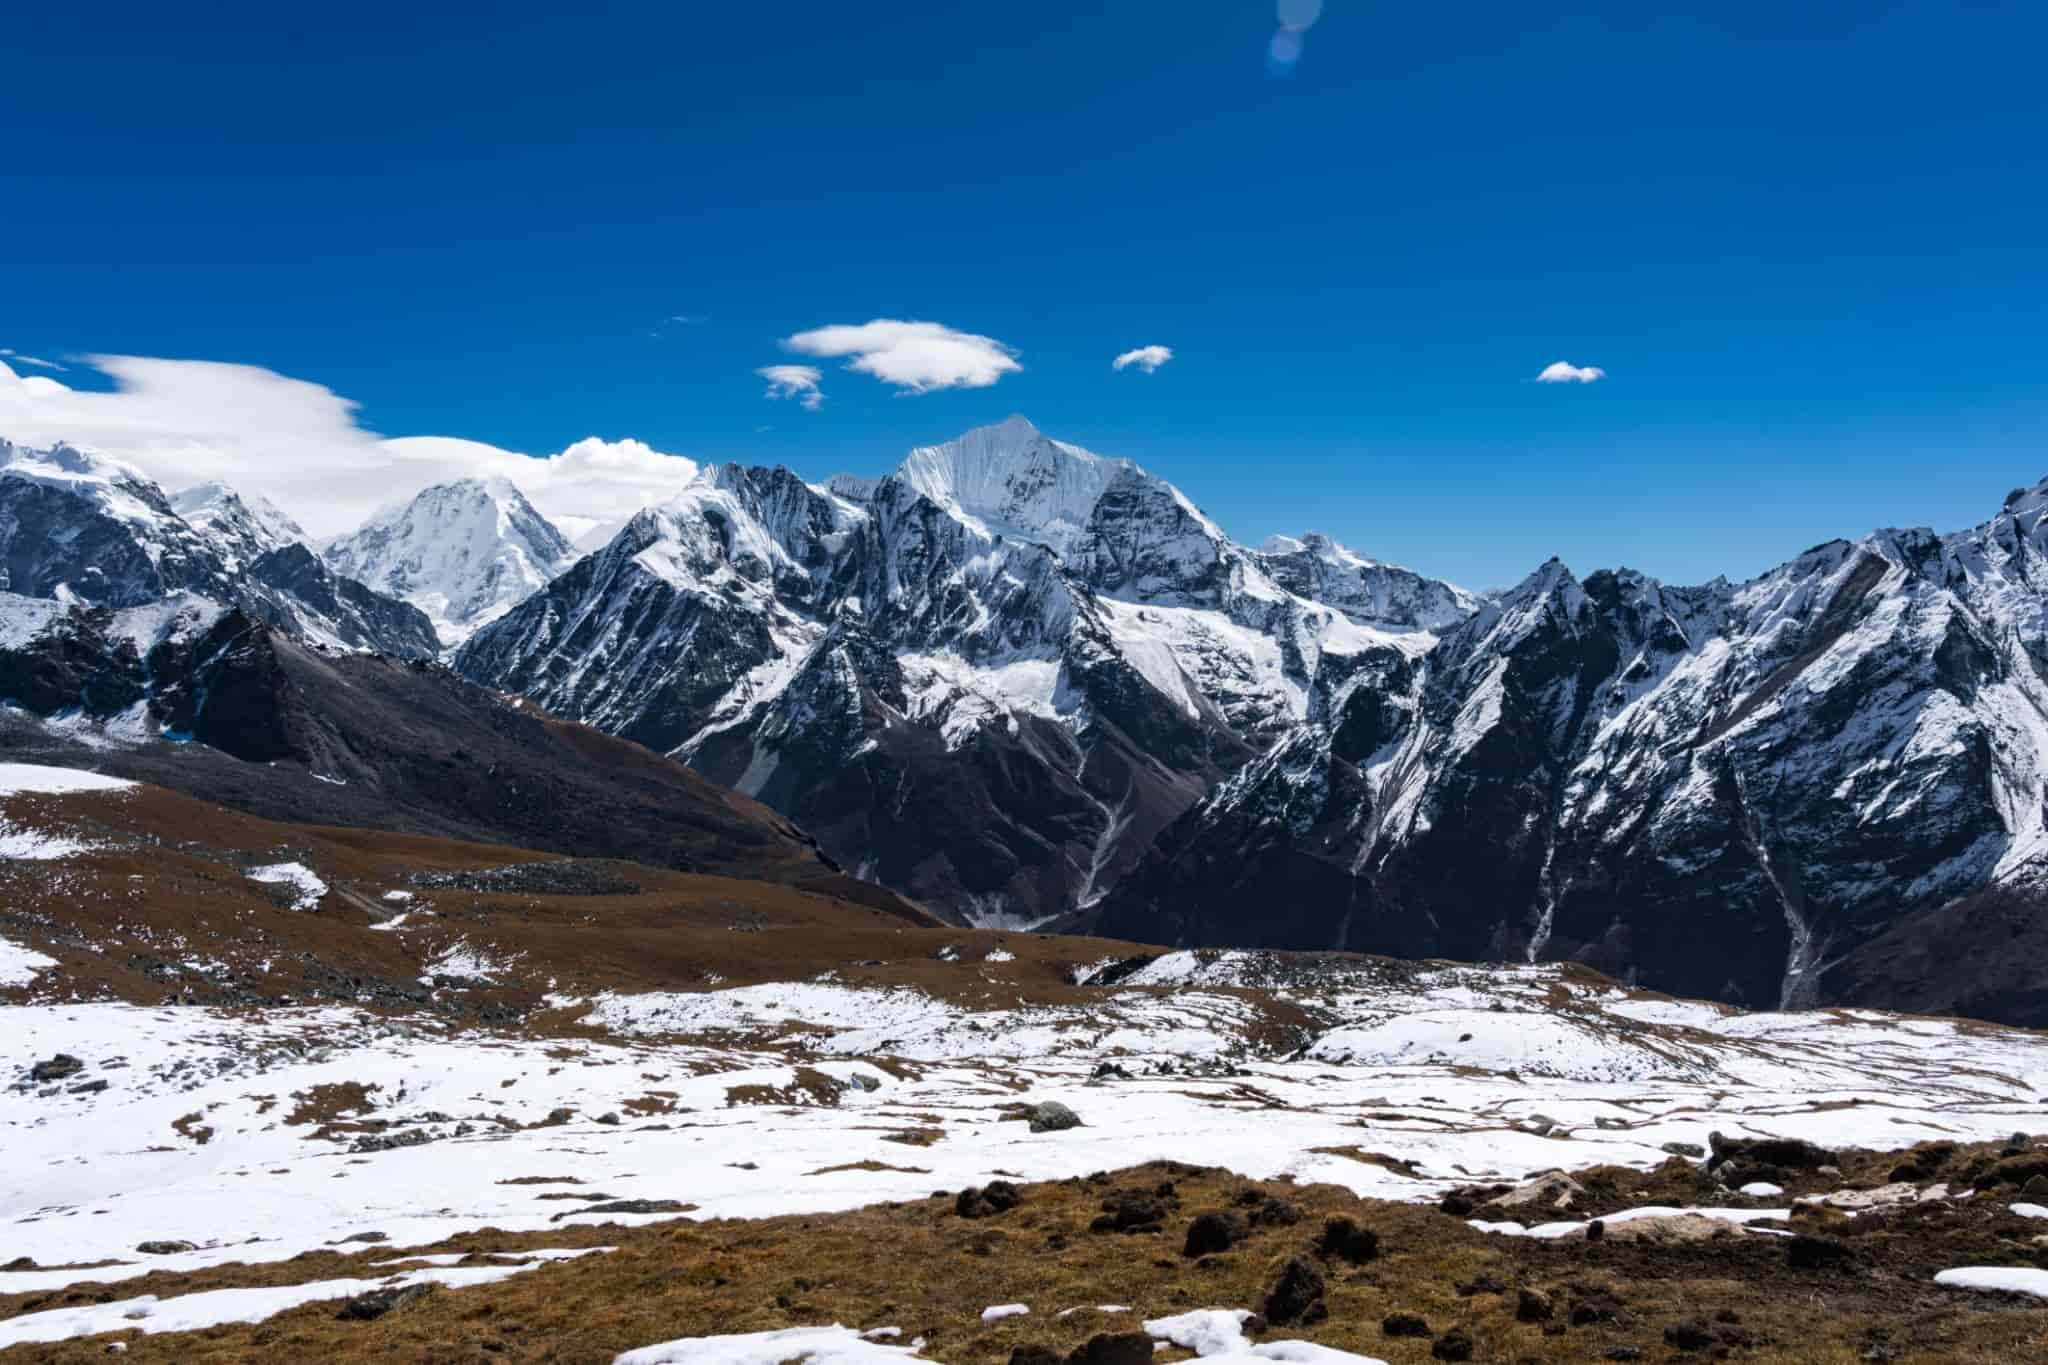
Jugal Himal Base Camp Trek: More Info
Best Time for Jugal Himal Base Camp Trek
The best seasons for the Jugal Himal Base Camp Trek are spring (March to May) and autumn (September to November). Both offer stable weather, clear mountain views and well-defined trails. Winter is possible for experienced trekkers, while the monsoon is not recommended.
Season at a Glance
| Season |
Months |
Weather |
Rating |
| Spring |
March to May |
Warm, sunny days, cool nights, occasional afternoon clouds |
Excellent |
| Autumn |
September to November |
Crisp, dry, clear skies, best visibility |
Excellent |
| Winter |
December to February |
Cold, snow at higher camps, short days |
Possible, with experience |
| Monsoon |
June to August |
Heavy rain, leeches, slippery trails, landslide-prone roads |
Not recommended |
Spring (March to May)
- Warm days, pleasant for walking, with cold nights at higher camps
- Rhododendron forests and wildflowers in bloom along the trail
- Long daylight hours and generally stable weather
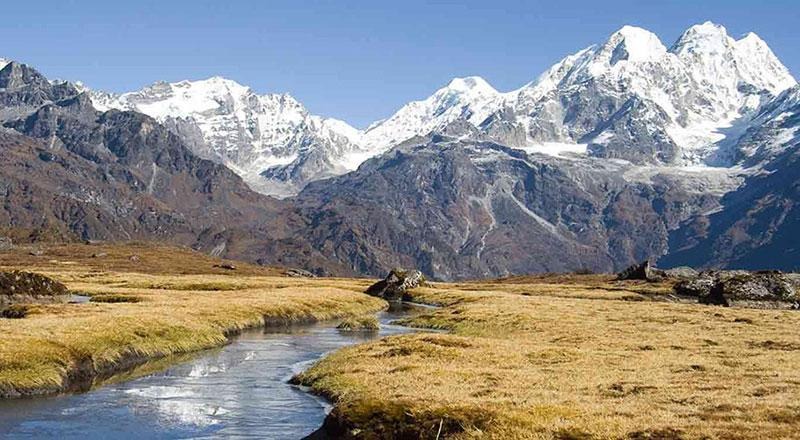
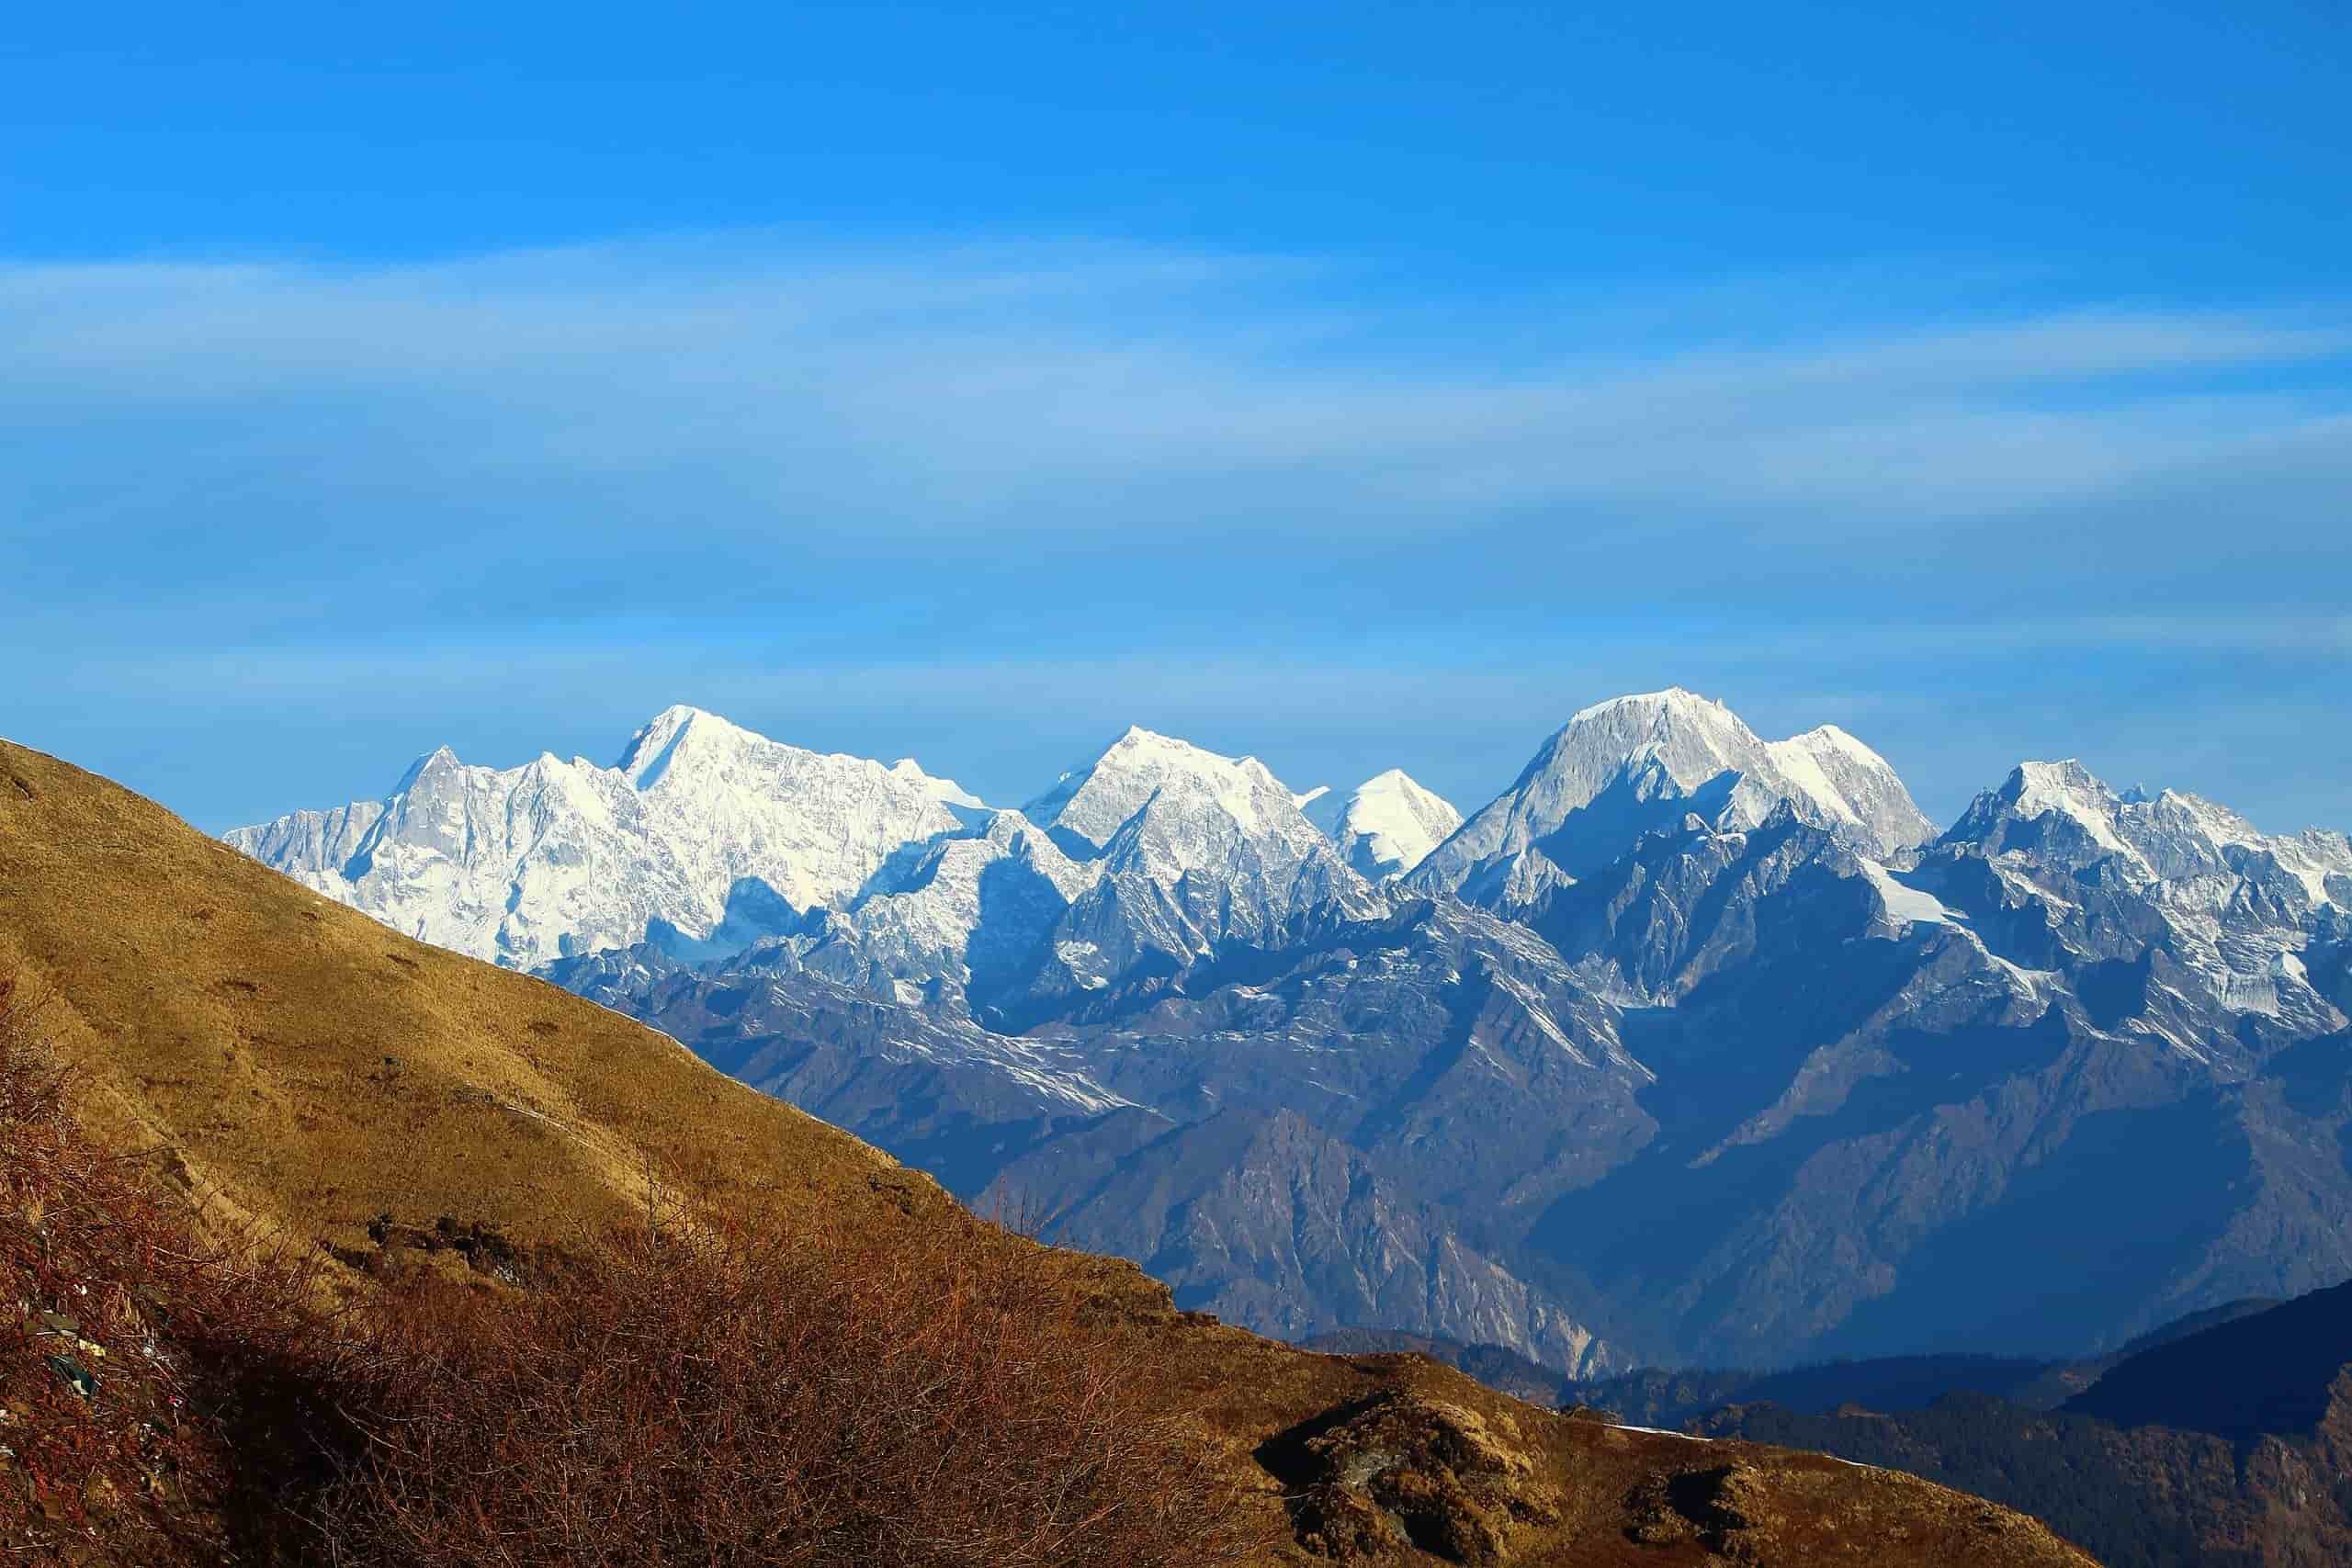
- Clear views of Dorje Lakpa, Phurbi Chyachu and the Jugal Glacier in the mornings
Autumn (September to November)
- Dry, crisp air with the clearest mountain views of the year
- Stable weather and well-defined trails after the monsoon
- Comfortable temperatures, though nights are cold above 3,500 m
- A good time for photography, and the busiest period, so book early
Winter (December to February)
- Very cold nights and snow at Palmothang and base camp, with possible trail closures
- Short days, but clear skies and almost no other trekkers
- Suitable only for well-equipped, experienced trekkers with a flexible schedule
Monsoon (June to August)
- Heavy rainfall, cloud-covered peaks and slippery, muddy trails
- Leeches in the forests and a high risk of landslides on the access road
- Avoid this season for safety and visibility
Our Recommendation
Choose April to May for flowers and warm days, or late October to November for the clearest skies. Whichever you pick, add a buffer day for weather, and wear layers, since temperatures drop quickly at altitude.
Note: Some operators list April, May, November and December as their preferred months. Adjust this section to the departure dates Nepal Trip Services actually runs.
Jugal Himal Base Camp Trek Route and Map
The Jugal Himal Base Camp Trek is an out-and-back route that starts and ends at Tembathang in Sindhupalchok, reached by road from Kathmandu. The trail climbs through forest and the sacred valley of Ne-Pemachhal to the glacier-side base camp at Yang Kharka (4,700 m), then returns by the same path.
Route at a Glance
Kathmandu → Tembathang → Chhendang → Ne-Pemachhal → Palmothang → Jugal Himal Base Camp (Yang Kharka) → Palmothang → Ne-Pemachhal → Chhendang → Tembathang → Kathmandu
Route Summary Table
| Day |
From |
To |
Altitude |
Time |
| 1 |
Airport |
Kathmandu |
1,400 m |
N/A |
| 2 |
Kathmandu |
Tembathang (drive) |
2,200 m |
6 to 7 hrs |
| 3 |
Tembathang |
Chhendang |
2,635 m |
6 to 7 hrs |
| 4 |
Chhendang |
Ne-Pemachhal |
3,500 m |
About 7 hrs |
| 5 |
Ne-Pemachhal |
Gyap Kharka and back (acclimatization) |
About 4,400 m+ |
5 to 6 hrs |
| 6 |
Ne-Pemachhal |
Palmothang |
3,900 m |
3 to 4 hrs |
| 7 |
Palmothang |
Jugal Himal Base Camp |
4,700 m |
5 to 6 hrs |
| 8 |
Base Camp |
Ne-Pemachhal |
3,500 m |
6 to 7 hrs |
| 9 |
Ne-Pemachhal |
Chhendang |
2,635 m |
5 to 6 hrs |
| 10 |
Chhendang |
Tembathang, then drive to Kathmandu |
1,400 m |
3 to 4 hrs trek, 6 to 7 hrs drive |
| 11 |
Kathmandu |
Departure |
N/A |
N/A |
Route Description
- Kathmandu to Tembathang: The drive follows the Arniko Highway through Sukute, Balefi, Jalbire and Gumba, then a rougher rural road to the Sherpa village of Tembathang.
- Tembathang to Chhendang: The trail passes the riverside hamlet of Dipu and the viewpoint at Chidakpu before a rocky hillside leads to Chhendang.
- Chhendang to Ne-Pemachhal: A steep forest climb passes Nimala, Ganji Khola, Chachung Kharka, Tongsokpa and the sacred Tongsuf Cave, then reaches the open valley of Ne-Pemachhal.
- Ne-Pemachhal to Palmothang: The route follows forest and a river uphill to a wide plateau used as a campsite, with glacier and Phurbi Chyachu views.
- Palmothang to Base Camp: The final section crosses steep, rocky terrain with short fixed-rope stretches, passes a small glacial lake and follows the glacier’s edge to Yang Kharka.
- Return: You descend the same trail back to Tembathang and drive to Kathmandu.
Key Landmarks Along the Trail
- Tembathang: Sherpa village and trailhead
- Dipu and Chidakpu: Riverside lunch stop and viewpoint
- Tongsuf Cave: Sacred cave on the way to Ne-Pemachhal
- Ne-Pemachhal: Hidden, sacred valley linked to Guru Rinpoche
- Gyap Kharka: Acclimatization viewpoint over the Jugal Glacier
- Palmothang: Open campsite plateau
- Yang Kharka: Jugal Himal Base Camp, beneath the glacier and Phurbi Chyachu
Map Notes
- The route is not heavily marked, so a local guide is strongly recommended.
- Mobile signal and GPS reliability are limited. Carry an offline map such as Maps.me or Gaia GPS, and download it before leaving Kathmandu.
- For your website, use a trail map with an elevation profile, labeling each camp and altitude, so trekkers can see the climb to 4,700 m at a glance.
- Optional extension: some longer itineraries add Panch Pokhari, which lengthens the trip beyond 11 days.
Jugal Himal Base Camp Trek Cost and Budget Guide
I used the live pricing and inclusions from the Nepal Trip Services trip page. The page lists a price of US$1,090 per person for a 2-person group (the starting price). Costs fall as the group grows.
Package Price (11 Days, Per Person)
| Group Size |
Price Per Person |
| 1 person (solo) |
US$1,390 |
| 2 people |
US$1,090 |
| 3 to 6 people |
US$925 |
| 7 to 10 people |
US$850 |
| Larger groups |
Contact for a quote |
Larger groups save more because guide, jeep, camping crew and equipment costs are shared. Solo trekkers pay more for the same reason.
What the Package Price Covers
- Transport: Airport transfers and a private jeep between Kathmandu and Tembathang, including driver and fuel
- Accommodation: 2 nights in a standard Kathmandu hotel with breakfast, plus homestay or tented camping on the trek
- Meals: Breakfast, lunch and dinner on the trek (Day 2 to Day 10), with tea and coffee at meals
- Staff: A licensed English-speaking guide, trek cook, camp crew and porters, with their wages, food and insurance
- Permits: All required trekking permits and paperwork
- Equipment: Sleeping bag and down jacket (returned after the trek) plus all group camping gear
- Taxes: Government taxes, VAT and service charges
Extra Costs to Budget For
| Expense |
Typical Estimate |
Notes |
| International flights |
Varies by origin |
Not included |
| Nepal tourist visa |
About US$30 to 50 |
Depends on the length of stay, so confirm the current fee |
| Travel insurance |
About US$50 to 150 |
Must cover trekking to 5,000 m and helicopter evacuation |
| Kathmandu meals (Day 1, 10, 11) |
About US$10 to 20 per meal |
Not included in the package |
| Extra hotel nights |
Varies |
Early arrival or late departure |
| Personal gear rental or purchase |
About US$50 to 200 |
Boots, poles, gloves, waterproofs if you do not own them |
| Snacks, bottled drinks, charging, hot showers |
About US$30 to 60 |
Prices rise with altitude |
| Tips for guide, porters and driver |
About 10 to 15% of the package price, as a common guide |
Pooled and shared at trek end |
| Optional sightseeing |
Varies |
Boudhanath, Swayambhunath and others |
Sample Total Budget (Excluding International Flights)
| Group Size |
Package |
Extras (estimate) |
Approx. Total |
| Solo |
US$1,390 |
US$300 to 500 |
US$1,700 to 1,900 |
| 2 people |
US$1,090 |
US$300 to 500 |
US$1,400 to 1,600 |
| 3 to 6 people |
US$925 |
US$300 to 500 |
US$1,225 to 1,425 |
| 7 to 10 people |
US$850 |
US$300 to 500 |
US$1,150 to 1,350 |
These totals are estimates and vary by personal spending, gear and insurance.
Why the Price Is Lower Than Other Operators
For comparison, other operators currently list 15 to 18 day versions at roughly US$2,190 to 2,800, and some international operators charge much more. The 11-day length, private jeep rather than flights and a compact schedule keep your cost down. A shorter trip also leaves less time for acclimatization, so book a buffer day if you can.
What Affects the Price
- Group size: The biggest factor, as the table shows
- Trip length: Extra days (a buffer or Panch Pokhari extension) add accommodation, food and staff costs
- Season: Spring and autumn departures may cost more than shoulder seasons
- Comfort level: Private rooms, single tent supplements and upgraded hotels cost extra
- Porter and gear needs: A personal porter or extra luggage adds cost
Ways to Save Money
- Join a group or travel with friends to reach the 3+ person rate
- Bring your own boots, poles and clothing instead of buying new gear
- Use the included sleeping bag and down jacket rather than renting separately
- Travel in shoulder months (early March or late November) for better availability, while checking weather risks
- Book travel insurance early, and compare policies that cover 5,000 m
What Not to Cut
Do not skip travel insurance, a licensed guide or proper acclimatization to save money. The route is remote, with few services and limited evacuation options, so safety costs are worth paying.
Payment and Booking Tips
- Confirm the deposit, balance payment and cancellation terms in writing before paying
- Ask what happens to the price if you add days or the group size changes
- Keep some small-denomination cash for tips, snacks and tea houses, as there are no ATMs on the trail
Permits and Entry Requirements for Jugal Himal Trek
The Jugal Himal region is remote and close to the Tibet border, so the permit system is stricter than on popular routes. All permits are arranged in Kathmandu before you leave, and a registered agency like Nepal Trip Services handles the paperwork.
Permits at a Glance
| Requirement |
Details |
| Trekking registration (TIMS / e-TIMS) |
Logs your details for safety and rescue. Applications are made through a licensed agency. |
| Conservation area entry permit |
One operator reports that most of the route falls within the Gaurishankar Conservation Area, with an entry fee of around NPR 3,000 for foreigners. |
| Restricted-area permit |
Several operators list a “Jugal Himal restricted area” permit as part of the package. Requirements for this area can differ by source and route. |
| Nepal tourist visa |
Needed by most foreign nationals (see fees below). |
| Licensed guide |
Required. Independent trekking is not permitted on this route. |
Important: Verify Before You Publish
Operators currently describe the permits differently. Some list a restricted-area permit with TIMS, while another describes a Gaurishankar Conservation Area permit with e-TIMS. The exact permit and fee depend on your route, such as the Tembathang to Ne-Pemachhal route versus a Panch Pokhari route. Before publishing a fee, confirm the current permit names and prices with the Nepal Tourism Board, the Department of Immigration or the conservation area office. Until then, it is safest to state that Nepal Trip Services arranges “all required permits” without listing a fee.
Do I Need a Guide?
Yes. The area is remote, trails are lightly marked, and permits are issued through registered agencies for guided groups. A licensed guide also gives you local knowledge, safety support and emergency coordination. Solo trekkers can still join the trip, but they must book through an agency with a guide.
Nepal Visa Information
Most visitors need a tourist visa, available online in advance or on arrival at Kathmandu airport and land borders. Fees listed by a current operator page:
| Duration |
Fee |
| 15 days |
USD 30 |
| 30 days |
USD 50 |
| 90 days |
USD 125 |
Apply online before travel and print your confirmation. Extensions can be arranged at immigration offices in Kathmandu or Pokhara. Confirm fees and rules with the Department of Immigration before you travel, since they can change.
Documents You Need to Provide
- Passport valid for at least 6 months, with a scanned copy
- Passport-size photos (usually 2 to 4)
- Nepal visa
- Travel insurance details covering trekking up to at least 5,000 m, including emergency helicopter evacuation
- Emergency contact details
- Your trek dates and itinerary
How and When Permits Are Arranged
- Booking: Send your passport copy, photos and insurance details when you confirm your trip.
- Preparation: Nepal Trip Services applies for the permits in Kathmandu, usually on or before Day 1 of your itinerary.
- Briefing: Your guide carries your permits and shows them at any checkpoints.
- On the trail: Keep copies of your passport, permits and insurance in your daypack.
For smooth processing, arrive in Kathmandu at least a day before the trek, and send documents several days before arrival. Permits cannot be obtained on the trail.
Permit Costs: Included or Not?
On the Nepal Trip Services package, all required trekking permits and paperwork are included in the price, so you pay no separate permit fee. Your visa, travel insurance and personal expenses are extra.
Tips for a Smooth Entry
- Check your passport validity and visa rules early.
- Buy insurance before you travel, and confirm that it covers altitude and evacuation.
- Carry spare passport photos and photocopies.
- Follow your guide’s instructions at checkpoints, especially near the border area.
- Respect conservation rules: carry out your trash, avoid plastic and stay on marked trails.
Is the Jugal Himal Base Camp Trek Right for You?
The Jugal Himal Base Camp Trek suits trekkers who want a quiet, remote Himalayan adventure close to Kathmandu. It is a rewarding trek, but it is demanding, with steady altitude gain and basic facilities.
This Trek Is Right for You If You:
- Want an off-the-beaten-path trail away from the crowds of Everest and Annapurna
- Enjoy glaciers, high mountain scenery and remote wilderness
- Are interested in Sherpa and Tamang culture and sacred sites such as Ne-Pemachhal
- Are physically fit and comfortable walking 4 to 7 hours a day
- Have some multi-day trekking experience, ideally at altitude
- Are happy with simple homestays and tented camping
- Have limited time and want a base camp trek in 11 days
- Prefer a road journey from Kathmandu with no flights
This Trek May Not Be Right for You If You:
- Want comfortable lodges, hot showers and reliable Wi-Fi every night
- Have never trekked before or have low fitness
- Have heart, lung or other health conditions that altitude can worsen
- Are uncomfortable with rough trails, steep sections or fixed ropes
- Need a relaxed pace with plenty of rest days
- Plan to trek in the monsoon or deep winter
- Want to trek independently without a guide
Quick Fit Check
| Question |
Ideal Answer |
| Fitness level |
Good, with regular cardio and hill training |
| Trekking experience |
Some multi-day trekking, ideally above 3,000 m |
| Comfort level |
Comfortable with basic facilities and camping |
| Altitude |
Willing to reach 4,700 m and follow acclimatization rules |
| Best season |
Spring (March to May) or autumn (September to November) |
| Group type |
Solo, couples, friends and small groups with a guide |
Who Will Enjoy It Most
- Trekkers seeking a quieter alternative to famous routes
- Photographers and nature lovers
- Cultural travelers interested in Himalayan communities
- Repeat visitors to Nepal wanting something new
- Fit first-time high-altitude trekkers who prepare well
Day-by-Day Trek Highlights and Daily Walking Hours
Summary Table
| Day |
Route |
Walking / Driving Time |
Altitude |
Highlight |
| 1 |
Arrival in Kathmandu |
None |
1,400 m |
Welcome, briefing, gear check |
| 2 |
Kathmandu to Tembathang |
6 to 7 hrs drive |
2,200 m |
Scenic drive to a Sherpa village |
| 3 |
Tembathang to Chhendang |
6 to 7 hrs walk |
2,635 m |
Riverside trail, Chidakpu viewpoint |
| 4 |
Chhendang to Ne-Pemachhal |
About 7 hrs walk |
3,500 m |
Tongsuf Cave, sacred hidden valley |
| 5 |
Acclimatization hike to Gyap Kharka |
5 to 6 hrs hike |
About 4,400 m+ |
Jugal Glacier and Phurbi Chyachu views |
| 6 |
Ne-Pemachhal to Palmothang |
3 to 4 hrs walk |
3,900 m |
Open plateau campsite beneath glaciers |
| 7 |
Palmothang to Jugal Himal Base Camp |
5 to 6 hrs walk |
4,700 m |
Base camp, glacier and ice walls |
| 8 |
Base Camp to Ne-Pemachhal |
6 to 7 hrs walk |
3,500 m |
Sunrise on the peaks, steep descent |
| 9 |
Ne-Pemachhal to Chhendang |
5 to 6 hrs walk |
2,635 m |
Forest and river trail |
| 10 |
Chhendang to Tembathang, drive to Kathmandu |
3 to 4 hrs walk plus 6 to 7 hrs drive |
1,400 m |
Final walk and farewell dinner |
| 11 |
Departure |
None |
N/A |
Airport transfer |
Total walking time: about 35 to 45 hours over 8 trekking days. Longest days: Day 4 and Day 8. Shortest trekking day: Day 6.
Day 1: Arrival in Kathmandu (1,400 m)
Meet your guide, join the trek briefing, check your gear and finish permit paperwork. Explore Thamel in the evening.
Day 2: Drive to Tembathang (2,200 m)
A 6 to 7 hour drive along the Arniko Highway through Sukute, Balefi, Jalbire and Gumba. Terraced hills, rivers and village life lead to the Sherpa village of Tembathang, the trailhead.
Day 3: Tembathang to Chhendang (2,635 m)
A 6 to 7 hour walk past the riverside hamlet of Dipu and the Chidakpu viewpoint, with Jugal Himal views. The trail ends in the quiet village of Chhendang.
Day 4: Chhendang to Ne-Pemachhal (3,500 m)
About 7 hours through dense forest on a rocky trail, passing Nimala, Ganji Khola, Chachung Kharka and Tongsokpa. Visit the sacred Tongsuf Cave before entering Ne-Pemachhal, the hidden valley linked to Guru Rinpoche. This is one of the toughest days.
Day 5: Acclimatization Hike to Gyap Kharka
A 5 to 6 hour round trip up a steep ridge to the Gyap Kharka viewpoint, passing Bumpasherpu at about 4,400 m. Look across to the Jugal Glacier and Phurbi Chyachu, then return to sleep at Ne-Pemachhal.
Day 6: Ne-Pemachhal to Palmothang (3,900 m)
A gentler 3 to 4 hour walk through forest and uphill along a river. Palmothang is a wide plateau with glacier views, and the afternoon is for rest.
Day 7: Palmothang to Jugal Himal Base Camp (4,700 m)
The highlight day, 5 to 6 hours over steep and rocky terrain with short fixed-rope sections. Pass a small glacial lake, follow the glacier edge and reach Yang Kharka, the base camp, surrounded by ice and high peaks.
Day 8: Base Camp to Ne-Pemachhal (3,500 m)
A 6 to 7 hour descent beside the river over rocky ground and glacial streams, past Palmothang and back through the forest. Breathing and sleep improve at lower altitude.
Day 9: Ne-Pemachhal to Chhendang (2,635 m)
A 5 to 6 hour walk via Chachung Kharka, Ganji Khola and Nimala, with snow peaks still visible from the village.
Day 10: Chhendang to Tembathang and Drive to Kathmandu (1,400 m)
A 3 to 4 hour walk via Chidakpu and Dipu to Tembathang, followed by a 6 to 7 hour drive to Kathmandu. Enjoy a farewell dinner.
Day 11: Final Departure
Transfer to the airport about three hours before your international flight.
Note: Walking times are approximate and vary with pace, weather and trail conditions. Gyap Kharka’s altitude should be confirmed with your guide.
Ne-Pemachhal: The Hidden Sacred Valley
Ne-Pemachhal is the cultural and spiritual heart of the Jugal Himal Base Camp Trek. This broad, peaceful valley sits at about 3,500 m, surrounded by forest, rock walls and snow peaks. It is revered as a sacred “hidden valley,” a place where Guru Rinpoche (Padmasambhava) is believed to have meditated, and it is often described as a Shangri-La-like retreat.
Quick Facts
| Detail |
Information |
| Altitude |
About 3,500 m (11,483 ft) |
| Location |
Jugal Himal, Sindhupalchok district, Nepal |
| Reached from |
Chhendang (about 7 hours of trekking) |
| Trek days spent here |
Day 4, Day 5 (acclimatization) and Day 8 (return) |
| Known for |
Sacred sites, quiet forest and meadow scenery, views of Dorje Lakpa and the Jugal peaks |
Why It Is Called Sacred
Local Buddhist communities regard Ne-Pemachhal as a hidden sanctuary, a place of retreat and meditation linked to Guru Rinpoche. Pilgrims and local people visit for prayer and spiritual practice, and the valley keeps a calm, undisturbed atmosphere. Respect for the site is part of the experience.
What You Will See
- Tongsuf Cave: A sacred meditation cave on the climb from Chhendang, reached after passing Nimala, Ganji Khola, Chachung Kharka and Tongsokpa
- Open valley and meadows: A wide, quiet basin with grazing land and clear streams
- Mountain views: Dorje Lakpa and the snow peaks of the Jugal Himal above the valley
- Forest trails: Dense woodland on the approach, rich in birdlife and, in spring, rhododendron blooms
- Local culture: Prayer flags and traditional Sherpa and Tamang influence across the region
Role in the Trek
Ne-Pemachhal is both a campsite and an acclimatization base. After the demanding climb on Day 4, you spend a second night here on Day 5 and hike up to the Gyap Kharka viewpoint, then return to sleep at lower altitude. This “climb high, sleep low” pattern prepares your body for the push to Palmothang and Jugal Himal Base Camp.
Best Time to Visit
Spring (March to May) and autumn (September to November) give the clearest mountain views and most stable weather. Spring adds rhododendron blooms, while autumn offers crisp air and good visibility.
Respecting the Sacred Site
- Dress modestly and speak quietly near religious sites
- Walk clockwise around mani walls and prayer structures
- Do not touch religious objects or offerings
- Ask your guide before photographing people or ritual spaces
- Carry out all trash and avoid disturbing the cave and surrounding area
Facilities
Accommodation here is basic, usually tented camp or simple lodging, with limited electricity, no reliable phone signal and no Wi-Fi. Your guide and crew arrange meals and camp set-up.
Panch Pokhari and Jugal Himal Trek Extension
The standard 11-day Jugal Himal Base Camp Trek goes straight to Ne-Pemachhal and the base camp. A longer version adds Panch Pokhari, the sacred lakes of the region, and other high-altitude sites. This extended route takes about 15 to 18 days and adds more culture, more acclimatization and more remote wilderness.
What Is Panch Pokhari?
Panch Pokhari (“five ponds”) is a high-altitude lake system in Sindhupalchok, sacred to both Hindus and Buddhists. The five clear lakes sit in a valley of rhododendron and pine forest, at about 4,055 m. Pilgrims visit throughout the year, with a major gathering during the monsoon festival in August. The area links to the Langtang region through mountain passes.
Standard Trek vs Extended Trek
| Feature |
Standard Trek |
With Panch Pokhari Extension |
| Duration |
11 days |
About 15 to 18 days |
| Trailhead |
Tembathang |
Thulo Bhotang or a similar start point |
| Main highlights |
Ne-Pemachhal, base camp |
Panch Pokhari, Ne-Pemachhal, base camp, Bhairab Kunda |
| Acclimatization |
One dedicated day |
Gradual, with extra days at altitude |
| Difficulty |
Moderate to challenging |
Challenging, with longer days |
| Cultural focus |
Sherpa village, sacred valley |
Pilgrimage sites, Tamang and Sherpa villages |
Sample Extended Route (Approximate)
One operator’s 18-day version follows this pattern:
- Kathmandu to Thulo Bhotang by road (about 2,600 m)
- Thulo Bhotang to Nosyampati (about 3,661 m), then a rest and acclimatization day
- Nosyampati to Panch Pokhari (about 4,055 m)
- Panch Pokhari to Nema-Gchukpa Kharka, then down to Chhendang (about 2,636 m)
- Chhendang to Ne-Pemachhal (about 3,500 m)
- Ne-Pemachhal to Gyap Kharka (about 4,400 m), then to Jugal Himal Base Camp (about 4,700 m)
- Return via Ne-Pemachhal, then Ne-Kharka, Jumle Pokhari and Bhairab Kunda (about 4,125 m)
- Descent via Thulo Dhunga to Kyangsing, then a drive back to Kathmandu
Altitudes and stops vary by operator and are not standardized, so confirm the final route with your guide.
Highlights of the Extension
- Panch Pokhari lakes: Five sacred ponds surrounded by peaks and meadows
- Bhairab Kunda: A Hindu pilgrimage lake below the eastern Jugal Himal, with a religious fair in August
- Jumle Pokhari: A high-altitude lake reflecting the surrounding peaks
- Pilgrim trails: Paths used by herders, pilgrims and shamans
- Longer wilderness experience: More days away from roads and crowds
- Better acclimatization: A slower altitude profile that improves comfort and success at 4,700 m
Who Should Choose the Extension?
- Trekkers with extra time who want a deeper, more cultural journey
- Those who prefer a gentler acclimatization rhythm
- Pilgrims and spiritually minded travelers
- Experienced trekkers who enjoy remote, high-altitude trails
Practical Notes
- Season: Spring (March to May) and autumn (September to November) are best. August is the pilgrimage season but falls in the monsoon, with rain, leeches and difficult trails.
- Accommodation: Expect lodges at lower stops and tented camping at higher camps, with basic facilities.
- Difficulty: The longer route includes several days above 4,000 m, so fitness and acclimatization matter.
- Permits and logistics: Permits, the trailhead and transport can differ from the standard route, so Nepal Trip Services arranges them in advance.
- Cost: Extra days add guide, crew, food and accommodation costs, so the price is higher than the 11-day package.
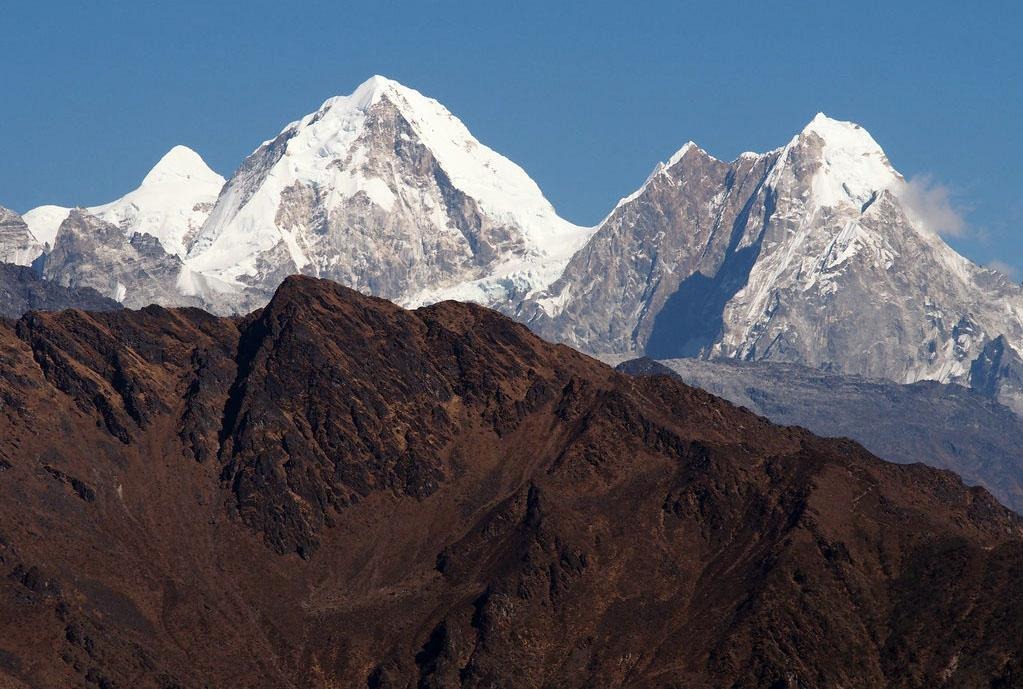
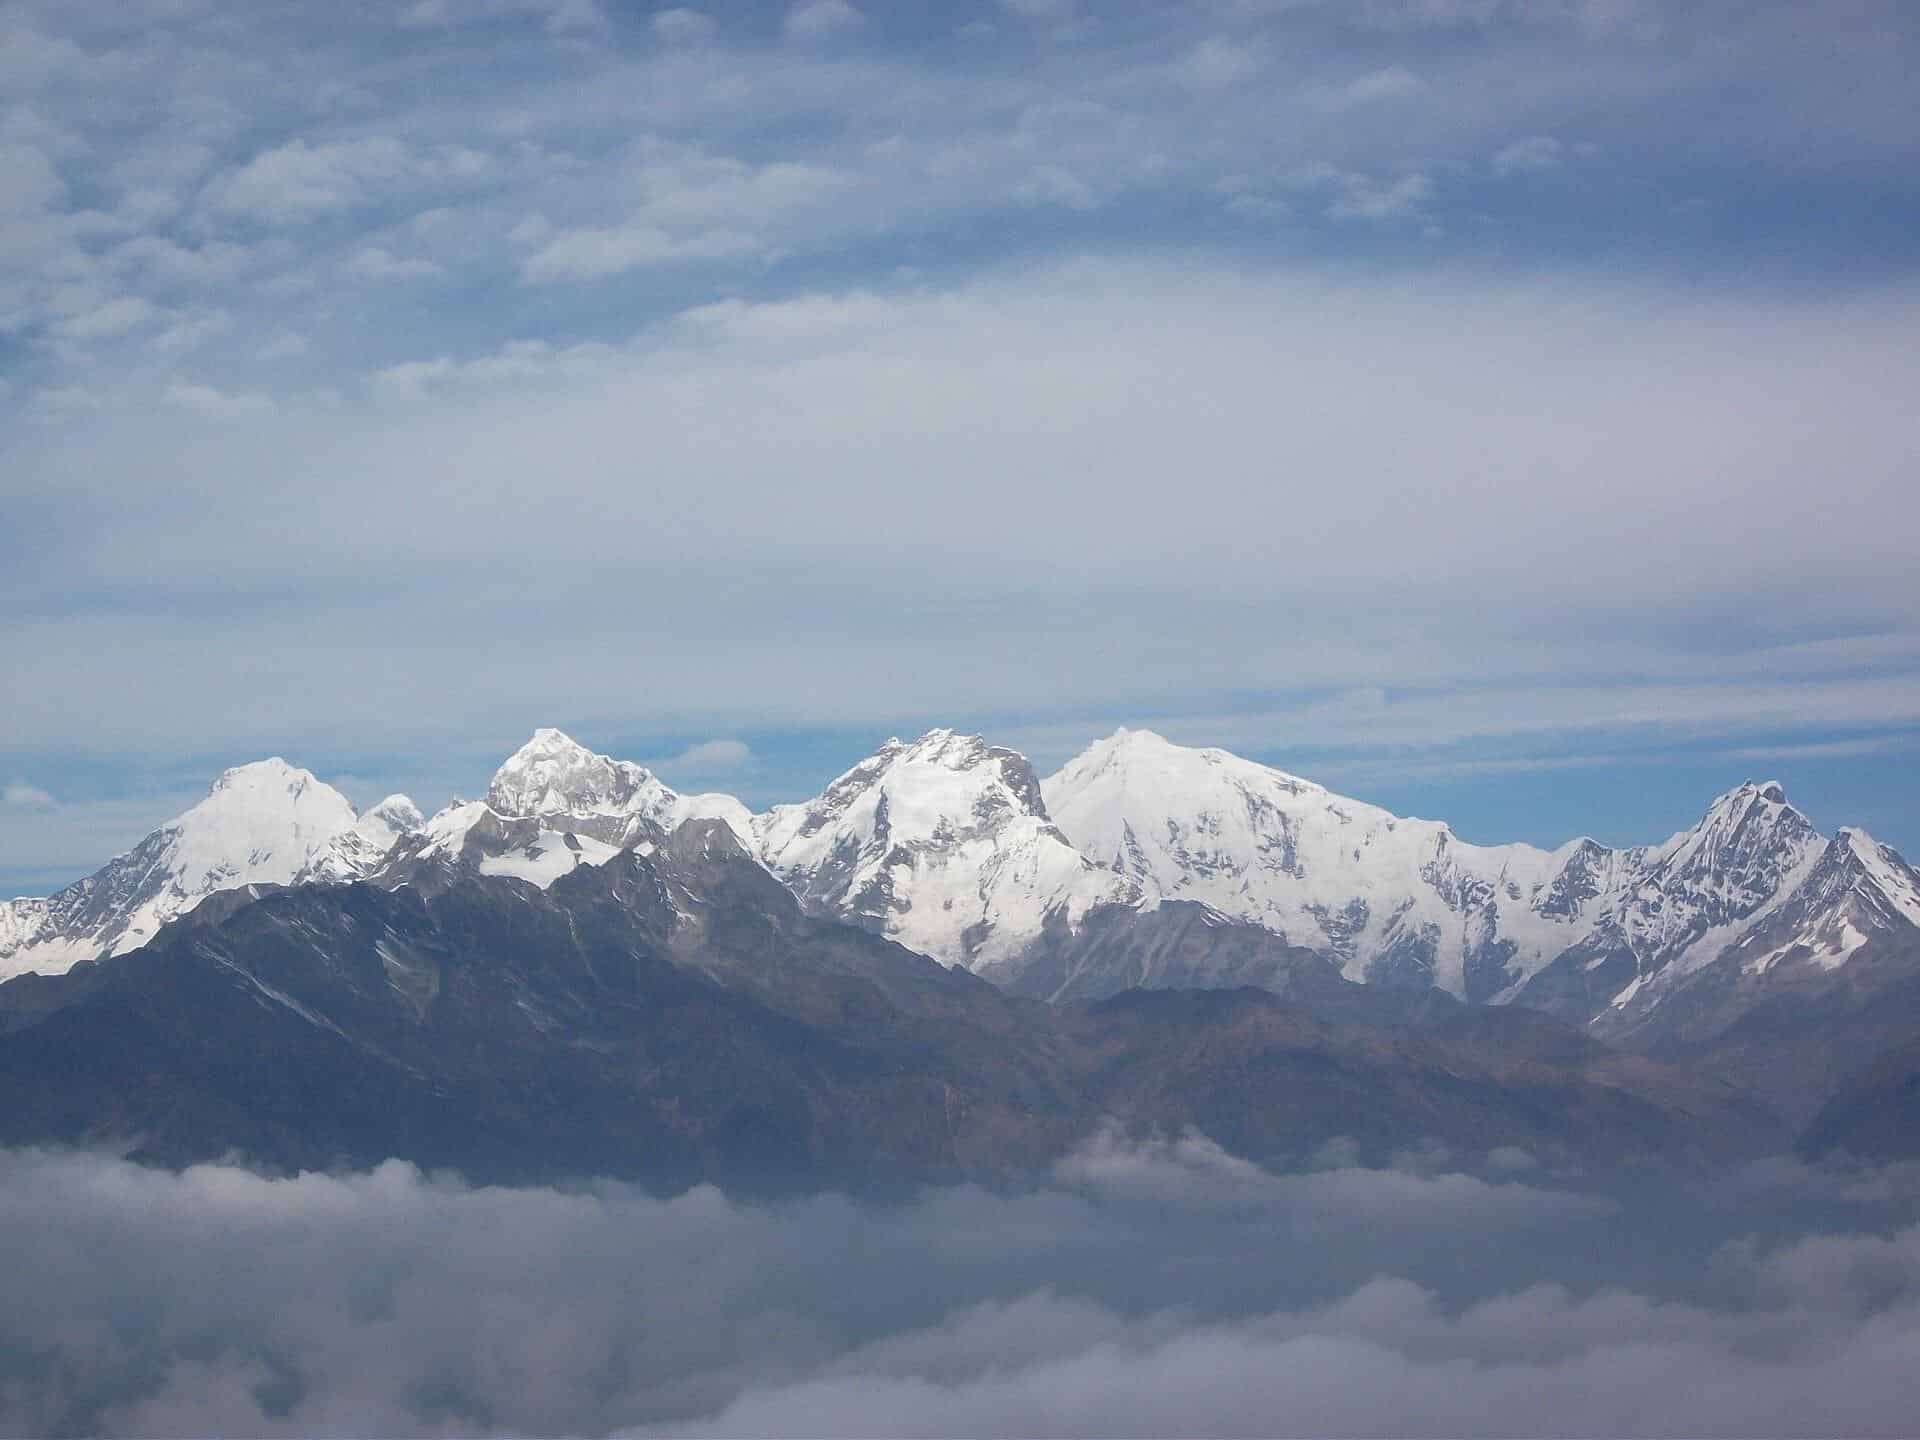
Mountain Views: Dorje Lakpa, Phurbi Chyachu and the Jugal Glacier
The Jugal Himal Base Camp Trek offers close-up views of some of the least-visited peaks in Nepal. From the forests of Ne-Pemachhal to the glacier-side base camp, the mountains grow larger and more dramatic with every day of the trek.
Mountains at a Glance
| Feature |
Height |
Where You See It |
| Dorje Lakpa |
About 6,966 m |
Ne-Pemachhal, Gyap Kharka and the approach to base camp |
| Phurbi Chyachu |
About 6,637 m |
Palmothang, the climb to base camp and base camp itself |
| Jugal Glacier |
N/A |
Gyap Kharka viewpoint and the final approach to base camp |
| Other Jugal peaks |
About 5,900 to 6,600 m |
Base camp area, including peaks opened for climbing in recent years |
Peak heights vary slightly between sources, so confirm the figures before publishing.
Dorje Lakpa
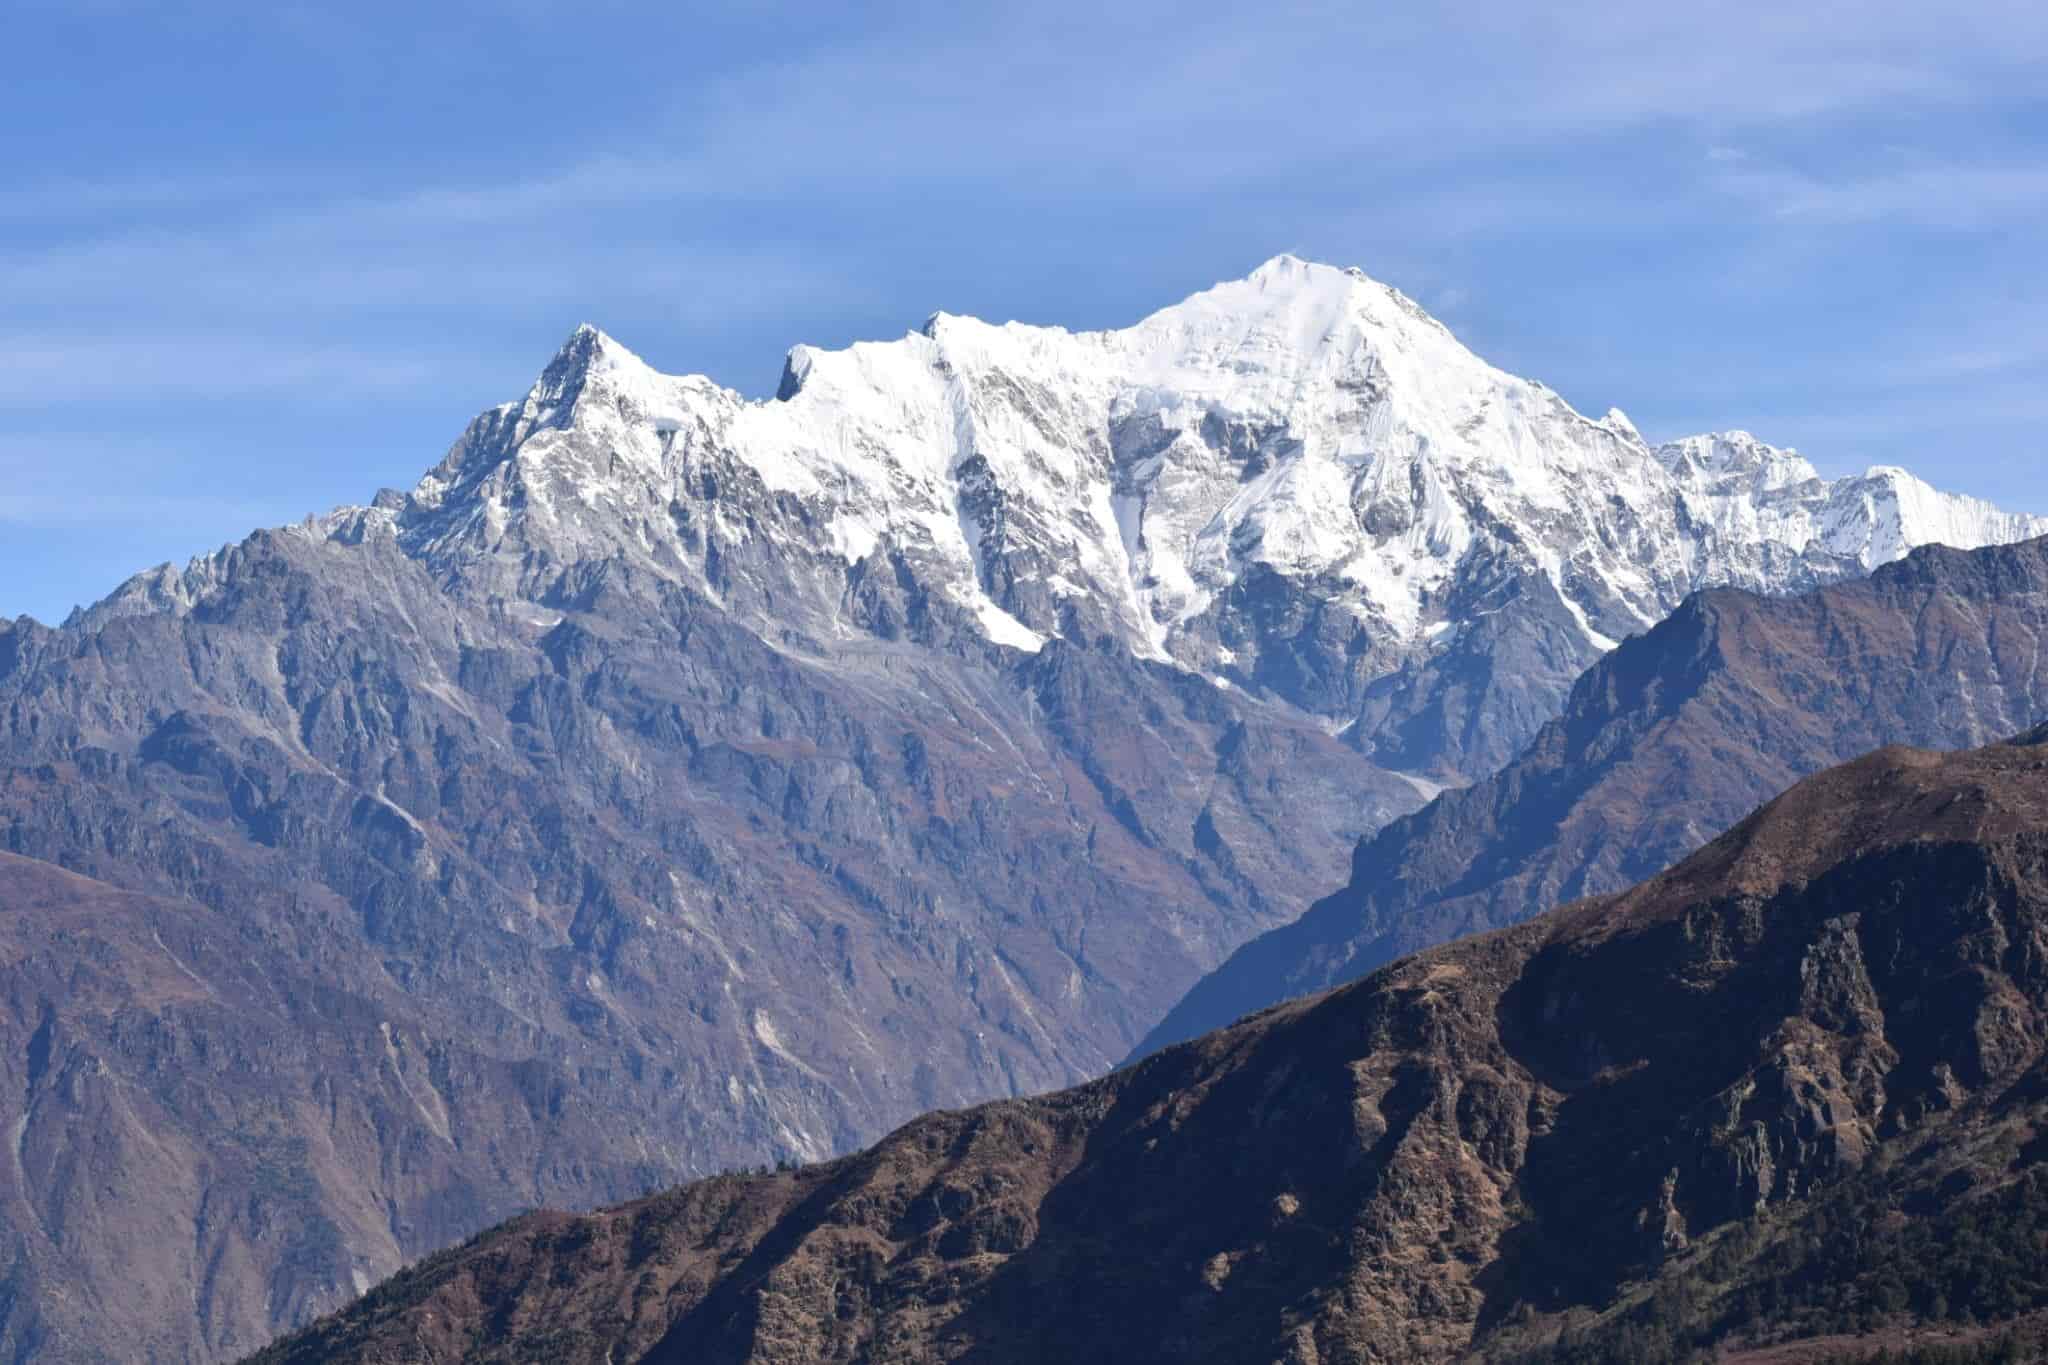
Dorje Lakpa is one of the most prominent peaks on this route. Its broad, snow-covered face rises above the Ne-Pemachhal valley, and it stays in view on much of the walk. It is best seen in clear morning light, when the snow glows gold at sunrise.
Phurbi Chyachu
Phurbi Chyachu dominates the upper section of the trek. From Palmothang, it rises beyond the river and glaciers, and it looms larger as you climb toward Yang Kharka. At base camp, you stand at the foot of the mountain, with steep ice walls and rocky ridges overhead.
The Jugal Glacier
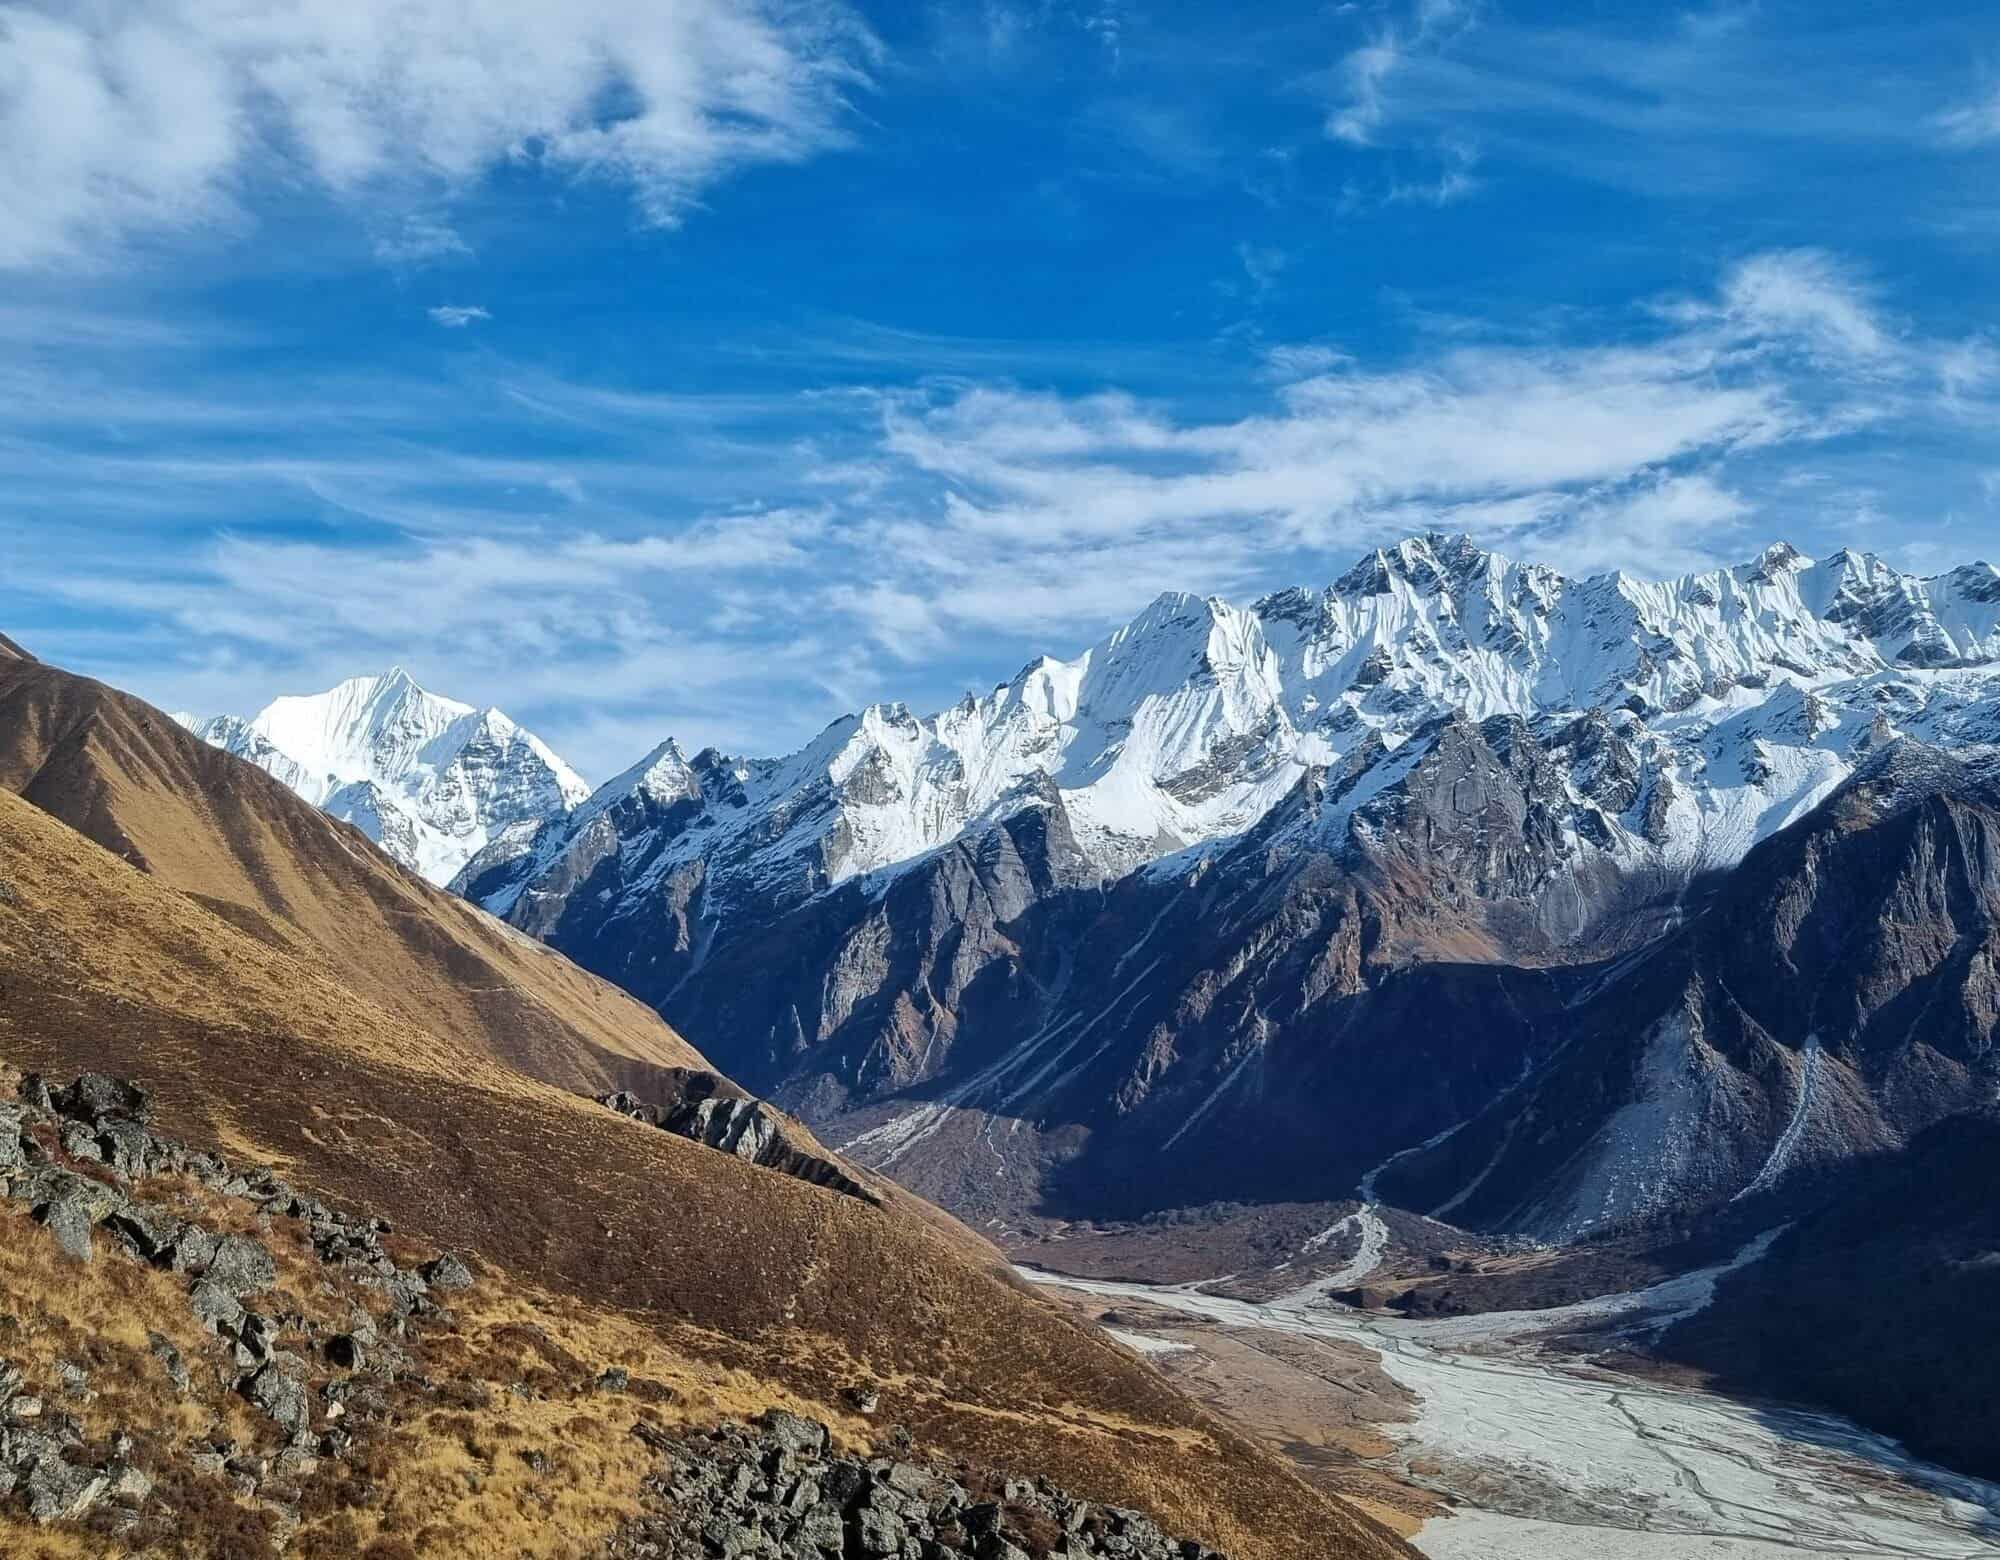
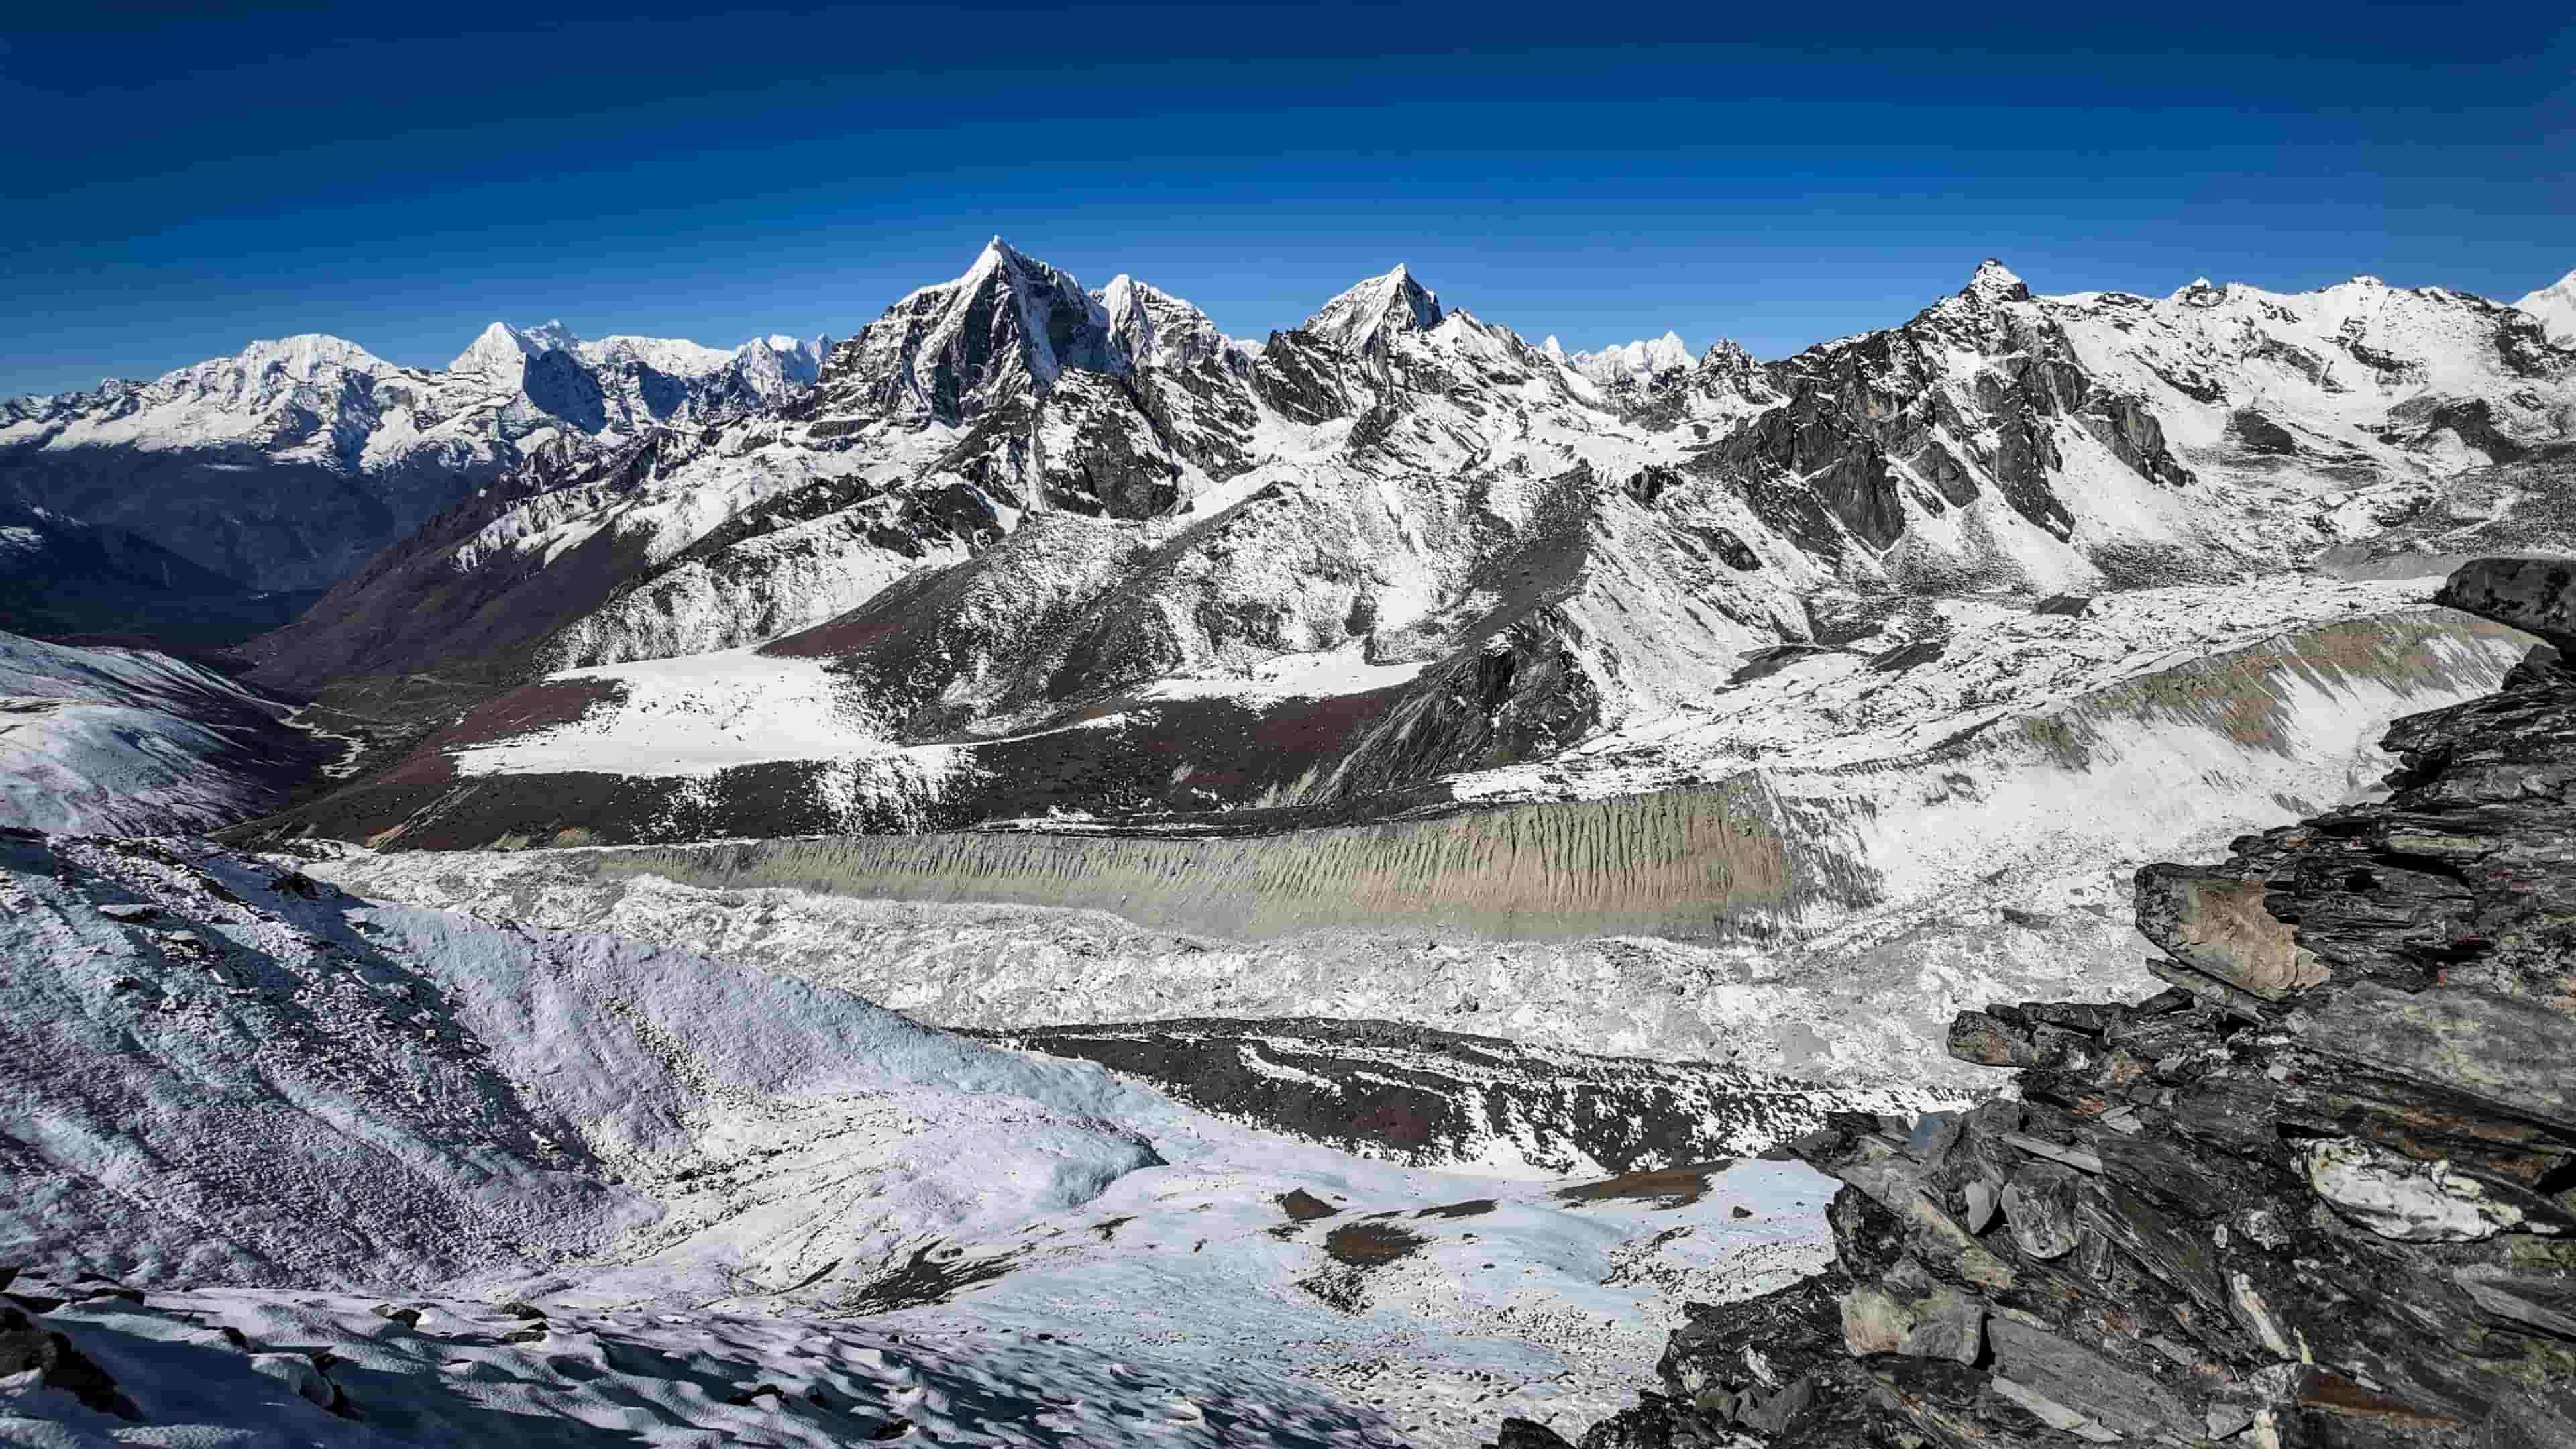
The Jugal Glacier is the main feature of the final days. You first see it from the Gyap Kharka viewpoint on the acclimatization hike, and then walk along its edge on Day 7. Expect moraines, ice walls, meltwater streams and a small glacial lake near base camp, all in an area of near silence.
Best Viewpoints on the Trek
- Chidakpu (Day 3): First views of the Jugal Himal ranges
- Ne-Pemachhal (Day 4 to 5): Dorje Lakpa and the snow peaks above the sacred valley
- Gyap Kharka (Day 5): The best panorama of the Jugal Glacier and Phurbi Chyachu
- Palmothang (Day 6): Glacier and peak views from an open plateau campsite
- Jugal Himal Base Camp (Day 7 to 8): Close-up views of ice, high peaks and glaciers, especially at sunrise
Other Peaks You May See
Depending on weather and the route, other nearby peaks such as Madiya Himal can be seen, and some itineraries mention distant views toward the Langtang range and the Tibetan border mountains.
Best Time for Mountain Views
Early morning (before 9 AM) gives the clearest skies, as clouds build later in the day. For the best visibility, trek in autumn (late September to November) or spring (March to May). Monsoon clouds often hide the peaks.
Photography Tips
- Start early for sunrise light on Dorje Lakpa and Phurbi Chyachu
- Bring a wide-angle lens for glacier scenes and a zoom lens for peak details
- Carry spare batteries and a power bank, because cold drains battery life quickly
- Protect your camera from dust and moisture
A Note on Climbing
Several Jugal peaks, including Jugal 1 to 5, were opened for climbing in recent years, and base camp serves as the starting point for expeditions. Trekkers stop at the base camp, and no climbing is part of this trek.
Local Culture of the Sherpa and Tamang Communities
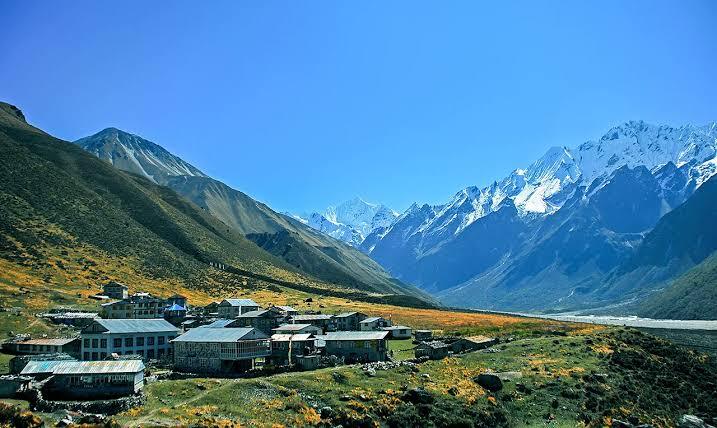
The Jugal Himal region is home to Sherpa and Tamang communities, whose Tibetan Buddhist traditions shape village life, festivals, food and the landscape itself. Meeting them is one of the most rewarding parts of the trek, and the quiet, lightly visited trails mean you experience the culture as it is lived, not staged for tourists.
The Two Communities
| |
Sherpa |
Tamang |
| Heritage |
Tibetan-origin Himalayan people, known for mountain skills |
One of Nepal’s largest ethnic groups, with Tibetan roots and a long history in the hills around Kathmandu |
| Where you meet them |
Tembathang and the higher, yak-herding settlements |
Villages across Sindhupalchok and the Helambu and Langtang borderlands |
| Livelihood |
Yak herding, farming, trade and trekking work |
Farming, livestock, forest products and trade |
| Religion |
Tibetan Buddhism (Nyingma tradition) |
Tibetan Buddhism, with local spiritual practices |
Village Life You Will See
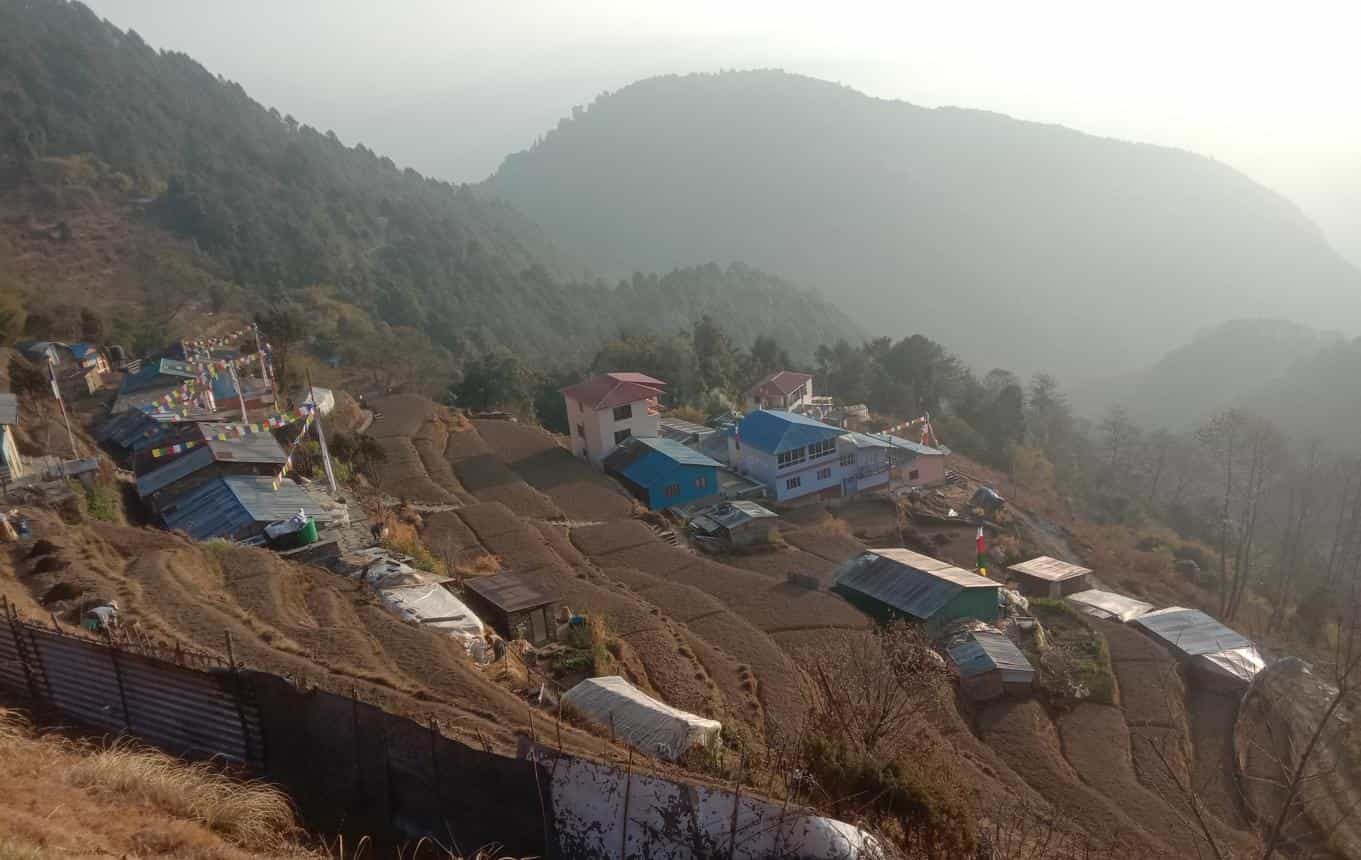
- Yak herding: Tembathang is known as a Sherpa village where yak herding is the main livelihood, and you pass grazing lands and pasture huts higher up.
- Terraced farming: Millet, maize, potatoes and barley grow on steep hillsides, depending on the season.
- Traditional houses: Stone and timber homes with slate or wooden roofs, often with prayer flags on the rooftops.
- Daily rhythm: Villagers rise early, tend animals and fields, and welcome visitors with tea and conversation.
Religious and Cultural Landmarks
- Prayer flags: Strings of colored flags carry blessings on the wind. Do not step over or burn them.
- Mani walls and chortens: Stone walls inscribed with mantras, and small stupas, found at village entrances and on trails. Walk to the left of them, keeping them on your right (clockwise).
- Gompas (monasteries) and shrines: Small temples in villages and sacred sites along the route.
- Sacred sites: The Tongsuf Cave and Ne-Pemachhal are connected with Guru Rinpoche, the founder of Tibetan Buddhism, and are important to local people.
- Mountain reverence: Many peaks and lakes are considered sacred, and locals ask visitors to treat them with respect.
Festivals and Traditions
- Lhosar (New Year): Celebrated by both communities around the Tibetan New Year season (usually February), with prayers, feasts and dances. Tamang and Sherpa communities each observe their own Lhosar.
- Pilgrimage season: Hindu and Buddhist pilgrims visit nearby sites such as Panch Pokhari and Bhairab Kunda, especially in August.
- Music and dance: The Tamang are known for the damphu drum and the lively Tamang Selo songs, and festivals often include group dances.
- Rituals and blessings: Lamas and local priests perform ceremonies for the community, and you may hear chanting or see offerings.
Food and Hospitality
Homestay and teahouse meals use local ingredients. Typical dishes include:
- Dal bhat (rice, lentils and vegetables)
- Thukpa (noodle soup) and momos (dumplings)
- Tsampa (roasted barley flour) and butter tea
- Potato dishes, dhindo and fermented greens (gundruk)
Guests are welcomed warmly, and staying in a homestay supports families directly. Accept tea or food with both hands if offered.
Respectful Etiquette for Trekkers
- Greet people with “Namaste” (or “Tashi Delek” in Buddhist communities) and a smile.
- Ask permission before photographing people, homes or religious ceremonies.
- Dress modestly, especially near temples, and remove shoes before entering sacred or private spaces.
- Do not touch religious objects, offerings or people’s heads.
- Walk clockwise around mani walls, chortens and prayer wheels.
- Leave no trash, and avoid giving sweets or money to children, which can encourage begging.
- Buy local products and hire local staff where possible.
Why It Matters
Spending time in these communities adds meaning to the scenery. Your homestay, meals and guide fees support families in a region that sees few visitors, helping preserve the culture and trails that make the Jugal Himal special.
Note: Festival dates and local customs vary by village and year, so confirm details with your guide before publishing specific dates.
Drinking Water, Toilets and Facilities on the Trail
The Jugal Himal Base Camp Trek is remote and lightly visited, so facilities are basic. Knowing what to expect helps you prepare and stay comfortable and healthy.
Facilities at a Glance
| Facility |
Lower Villages (Tembathang, Chhendang) |
Mid and Upper Camps (Ne-Pemachhal, Palmothang, Base Camp) |
| Accommodation |
Homestay or simple lodge |
Tented camp or very basic shelter |
| Drinking water |
Boiled or filtered |
Boiled or treated by the crew |
| Toilets |
Simple shared toilets |
Portable toilet tent |
| Hot showers |
Limited, may cost extra |
Not available |
| Electricity / charging |
Limited, often paid |
Not available |
| Wi-Fi / mobile signal |
Patchy or none |
None |
| Shops |
Small village shops |
None |
Drinking Water
- Source: Water comes from streams and village taps, and should never be drunk untreated.
- Treatment: Your crew boils or filters water at camps, and you can also treat your own with purification tablets, a filter or a UV purifier.
- Bottled water: Available at lower villages, but expensive, wasteful and not available higher up.
- How much to drink: Aim for 3 to 4 liters per day at altitude to help prevent altitude sickness.
- What to carry: A reusable bottle (1 to 2 L), ideally insulated or kept inside your jacket in cold weather to prevent freezing.
- Eco-tip: Avoid single-use plastic bottles, and refill from treated water instead.
Toilets
- Villages and homestays: Simple shared toilets, often squat-style, with bucket flush or basic pits. Quality varies.
- Camps: The crew sets up a private toilet tent with a pit or portable system, and waste is managed according to local and conservation rules.
- On the trail: If you need to go outdoors, move well away from water sources and trails, dig a small hole, and pack out used toilet paper and sanitary items.
- Bring: Toilet paper, hand sanitizer, a small trowel (optional) and zip bags for waste.
Showers and Washing
- Hot showers are limited in villages and may cost extra, and are not available at higher camps.
- Bring biodegradable wet wipes, a quick-dry towel and a small amount of biodegradable soap.
- Warm washing water is sometimes provided by the crew in the morning.
Electricity and Charging
- Power is unreliable and mostly unavailable at higher stops. Some villages may offer paid charging.
- Bring a power bank (10,000 to 20,000 mAh), spare camera batteries and a headlamp with spare batteries.
- Keep electronics warm inside your sleeping bag at night, because cold drains batteries quickly.
Internet and Phone Signal
- Mobile coverage is patchy in lower villages and usually absent higher up. Wi-Fi is rare.
- Tell family to expect limited contact. A satellite phone or radio is recommended for emergencies.
Food Facilities
- Meals are cooked by the trek cook at camps and by hosts in homestays.
- Kitchens are simple, so food is hot and filling but menus are limited.
- Carry snacks such as nuts, chocolate and energy bars for long days.
Money and Shops
- There are no ATMs on the trail. Carry enough cash in small notes for tips, tea, snacks and charging.
- Shops exist only in lower villages and sell basic items at higher prices.
Health and Hygiene Tips
- Wash hands with soap or sanitizer before meals and after toilet use.
- Avoid salads, unboiled water and ice.
- Pack a basic first-aid kit with blister care, rehydration salts and stomach medicine.
- Tell your guide immediately if you have stomach problems, because dehydration worsens altitude symptoms.
What to Pack for Facilities
Reusable bottle, purification tablets or filter, toilet paper, wet wipes, hand sanitizer, power bank, headlamp, earplugs, a quick-dry towel and cash in small notes.
Safety and Health on the Jugal Himal Base Camp Trek
The Jugal Himal Base Camp Trek is non-technical, but it is remote. It reaches 4,700 m, with limited facilities and no easy road access beyond the trailhead. Good preparation, a slow pace and an experienced guide keep the trek safe.
Main Risks at a Glance
| Risk |
Where It Matters |
How We Reduce It |
| Altitude sickness |
Above 3,000 m, especially Ne-Pemachhal to base camp |
Gradual ascent, acclimatization day, daily health checks |
| Rough terrain |
Steep forest paths, moraine, fixed-rope sections |
Experienced guide, trekking poles, early starts |
| Weather changes |
Cold nights, snow, wind, rain |
Layered clothing, flexible schedule, weather checks |
| Stomach illness |
Throughout the trek |
Boiled or treated water, hygienic cooking |
| Remote location |
All upper camps |
Emergency plan, communication device, insurance |
Altitude Sickness (AMS)
Anyone can be affected above 3,000 m, regardless of fitness.
- Early signs: Headache, nausea, dizziness, poor sleep, fatigue, loss of appetite
- Serious signs: Confusion, loss of balance, breathlessness at rest, persistent cough, severe headache that does not ease
- Prevention: Walk slowly, drink 3 to 4 liters of water daily, eat well, avoid alcohol and never skip the acclimatization day at Ne-Pemachhal
- Action: Tell your guide at the first symptom. Do not climb higher with worsening symptoms, and descend if they do not improve or if they become serious
- Medication: Ask your doctor before the trip about altitude medication and what to carry
Guide and Crew Safety Measures
- A licensed, first-aid-trained guide leads the trek and monitors your health each day
- Daily checks of how you feel, and a pulse oximeter if available
- Flexible pacing and permission to turn back or rest
- A well-stocked first-aid kit, and ideally emergency oxygen or a portable altitude chamber
- Care on fixed-rope sections near base camp
Trail Safety Tips
- Walk at a slow, steady pace and stay with your guide
- Use trekking poles on steep, rocky descents
- Start early, because afternoon weather can change quickly
- Stay on marked paths and avoid shortcuts on loose ground
- Keep a safe distance from glacier edges, moraine slopes and fast streams
- Do not hike alone or leave the group without telling your guide
Weather and Cold Safety
- Nights near Palmothang and base camp drop below freezing
- Wear layers, a warm hat, gloves and a down jacket, and keep clothing dry
- Protect against sun with sunglasses, sunscreen and lip balm, since UV is strong at altitude
- Watch for signs of hypothermia (shivering, slurred speech, confusion) and frostbite (numb, pale skin)
Food, Water and Hygiene
- Drink only boiled, filtered or treated water
- Eat freshly cooked, hot meals, and avoid salads and raw food
- Wash hands with soap or sanitizer before meals and after toilet use
- Tell your guide about stomach problems early, because dehydration worsens altitude symptoms
Travel Insurance
Insurance is mandatory. Your policy should cover:
- Trekking up to at least 5,000 m
- Emergency helicopter evacuation and medical treatment
- Hospital care, repatriation and trip cancellation
- Lost or delayed baggage and equipment
Read the policy carefully, because many standard plans exclude altitude trekking. Carry a printed copy and your policy number.
Emergency Evacuation
- A helicopter can sometimes reach the upper section when weather allows, but flights depend on visibility and conditions
- Your guide contacts the agency and insurance company, who coordinate the rescue
- Slower options include descent on foot, porter assistance or road transfer from the trailhead
- Delays are possible because of weather and the remote location, so insurance and early action matter
Communication
- Mobile and internet coverage are limited in villages and absent at higher camps
- A satellite phone or radio is recommended for emergencies
- Share your itinerary and contact details with family, and agree on check-in times
Medical Preparation Before You Go
- Visit your doctor for a check-up, especially if you have heart, lung, blood pressure, diabetes or other conditions
- Carry personal medicines, a basic first-aid kit and blister care
- Check vaccinations and travel health advice for Nepal
- Train for 6 to 8 weeks with cardio, hill walking and leg strengthening
Emergency Kit Checklist
Personal medicines, pain relievers, rehydration salts, stomach medicine, blister plasters, bandages, antiseptic, thermal blanket, headlamp, whistle, power bank and copies of your passport, insurance and emergency contacts.
Golden Rules
- Listen to your body and report symptoms early
- Never ignore altitude sickness
- Follow your guide’s decisions on route and weather
- Descend if you get worse
- Keep your insurance and emergency contacts ready
Altitude Sickness Prevention and Acclimatization Guide
The Jugal Himal Base Camp Trek reaches 4,700 m (15,420 ft). At this height, the air holds roughly half the oxygen found at sea level, so altitude sickness is the main health risk. It can affect anyone, regardless of age or fitness, and it is largely preventable with a gradual ascent, good habits and early action.
Altitude Sickness at a Glance
| Level |
Typical Signs |
What to Do |
| Mild AMS |
Headache, nausea, dizziness, poor sleep, fatigue, loss of appetite |
Tell your guide, rest, drink water and do not go higher until symptoms ease |
| Moderate AMS |
Worsening headache, vomiting, extreme tiredness, unsteady walking |
Stop ascending, rest, and descend if there is no improvement |
| Severe (HAPE / HACE) |
Breathlessness at rest, wet cough, confusion, loss of coordination, drowsiness |
Emergency: descend immediately and arrange evacuation |
HAPE is fluid in the lungs, and HACE is swelling of the brain. Both are life-threatening and need immediate descent.
Altitude Profile of the Trek
| Day |
Sleeping Altitude |
Change From Previous Night |
| 2 |
Tembathang, 2,200 m |
Start |
| 3 |
Chhendang, 2,635 m |
+435 m |
| 4 |
Ne-Pemachhal, 3,500 m |
+865 m |
| 5 |
Ne-Pemachhal, 3,500 m |
Rest and acclimatization day |
| 6 |
Palmothang, 3,900 m |
+400 m |
| 7 |
Base Camp, 4,700 m |
+800 m |
| 8 |
Ne-Pemachhal, 3,500 m |
Descent |
A common guideline is to raise your sleeping altitude by no more than about 300 to 500 m per night above 3,000 m. Two nights on this route exceed that: Day 4 (+865 m) and Day 7 (+800 m). The Day 5 acclimatization day helps, but these jumps are the reason this compact 11-day schedule asks for good fitness and careful self-monitoring. A buffer day (for example, an extra night at Ne-Pemachhal or Palmothang) lowers the risk further.
How Acclimatization Works Here
- Day 3 and 4: Gradual climbs through forest, with the body beginning to adapt
- Day 5, “climb high, sleep low”: A hike to Gyap Kharka (about 4,400 m) followed by a return to sleep at 3,500 m. This helps your body build adaptation without sleeping higher
- Day 6: A short, gentle walk to Palmothang for rest before the big push
- Day 7: Base camp visit, then a descent the next morning, which is the best treatment for symptoms
Prevention Rules
- Go slowly. Walk at a pace where you could hold a conversation. Fast walkers often get sick first.
- Drink 3 to 4 liters of water daily. Dehydration mimics and worsens altitude symptoms.
- Eat well. High-carbohydrate meals support energy, even when your appetite is low.
- Avoid alcohol, smoking and sleeping pills. They interfere with breathing and acclimatization.
- Do not skip the acclimatization day. It is built into the schedule for safety.
- Rest when you need to. Tell your guide early rather than pushing on.
- Keep warm. Cold stress adds to fatigue and slows recovery.
- Sleep as low as practical. Never sleep higher if you have symptoms.
Medication
Some trekkers use acetazolamide (Diamox) to help prevent altitude sickness. This is a decision to make with your doctor before you leave, since it is not suitable for everyone, including people with sulfa allergies or certain medical conditions. Medication does not replace gradual ascent and does not make it safe to ignore symptoms. Your doctor can also advise on emergency medicines.
Daily Health Checks
Your guide should check how you feel every morning and evening. Use a simple self-check:
- Do you have a headache that does not improve with rest or pain relievers?
- Are you nauseous or unable to eat?
- Do you feel unusually dizzy, weak or breathless?
- Did you sleep very poorly?
If you can answer yes to several of these, tell your guide immediately. A pulse oximeter can add useful information, though readings must be read together with symptoms and not alone.
The Golden Rules
- Never go higher with symptoms.
- If you get worse, descend.
- Never leave a sick person alone.
- Symptoms are never “just tiredness” until proven otherwise.
Descent and Evacuation
Descent of even 300 to 500 m often brings quick relief, and descent is the most effective treatment. For severe symptoms, your guide arranges evacuation, by helicopter if weather allows, or by foot and vehicle if not. Because evacuation can be delayed in this remote area, travel insurance covering trekking to at least 5,000 m and helicopter rescue is essential. Emergency oxygen or a portable altitude chamber, where carried, can stabilize a patient while descent is arranged.
Who Has Higher Risk
- People with a past history of altitude illness
- Those who ascend quickly or skip rest days
- Trekkers with heart, lung or blood conditions, or who are pregnant
- People who are dehydrated, exhausted, unwell or drinking alcohol
- Anyone who ignores early symptoms
Preparing Before the Trek
- See your doctor for a check-up, especially with existing conditions
- Train for 6 to 8 weeks with cardio, hill walking and leg strengthening
- Arrive in Kathmandu a day early to rest and settle in
- Pack warm layers, a good sleeping bag and a personal first-aid kit
- Carry copies of insurance details and emergency contacts
Travel Insurance for the Jugal Himal Trek
Travel insurance is mandatory for the Jugal Himal Base Camp Trek. The route is remote and reaches 4,700 m, with limited facilities and no easy road access beyond Tembathang. If something goes wrong, a helicopter evacuation or hospital stay can cost thousands of dollars, so a suitable policy is essential. Insurance is not included in the Nepal Trip Services package, so you must arrange it yourself before you travel.
Why You Need It
- Helicopter rescue from remote camps is expensive and usually requires proof of cover or payment
- Altitude sickness, injuries and illness can need urgent medical care in Kathmandu or abroad
- Weather, landslides or cancellations can disrupt flights and bookings
- Many standard travel policies exclude trekking above a certain altitude
What Your Policy Must Cover
| Cover |
Minimum Requirement |
| Maximum altitude |
Trekking up to at least 5,000 m (the base camp is 4,700 m) |
| Emergency helicopter evacuation |
Included, from the trail to Kathmandu or a hospital |
| Medical expenses |
Hospital treatment, doctor visits and medication in Nepal |
| Repatriation |
Return to your home country for medical reasons |
| Trip cancellation and interruption |
Covers prepaid costs if you cannot travel or must cut the trip short |
| Baggage and equipment |
Loss, theft or delay of belongings, including trekking gear |
| Personal liability |
Covers accidental damage or injury to others |
Check the Fine Print
- Altitude limit: Make sure the policy states the covered altitude clearly and covers trekking, not just “hiking.”
- Guided trekking: Some policies only cover trips led by a licensed guide, which this trek is.
- Pre-existing conditions: Declare them, or the claim may be refused.
- Helicopter rescue: Confirm it is covered in full and whether the insurer pays directly or you must pay first and claim later.
- Activity exclusions: Check that trekking is not excluded or limited.
- Emergency contact: Look for a 24-hour assistance number and know how to reach it from Nepal.
- Exclusions: Alcohol-related incidents, travel against medical advice and ignoring guide instructions are common reasons for rejection.
Estimated Cost
Policy prices vary by age, country, trip length, cover level and insurer. As a rough guide, many trekkers spend about US$50 to 150 for a short trek policy, though higher cover can cost more. Compare several providers before you buy, and confirm the figures with the insurers.
How to Choose a Policy
- Search for providers that clearly offer trekking cover up to 5,000 m or higher
- Compare helicopter evacuation limits, medical limits and exclusions
- Read customer reviews, particularly about claims for Nepal or altitude treks
- Buy the policy before you pay non-refundable trip costs, so cancellation cover applies
- Carry a printed copy and a digital copy, with your policy number and the assistance phone number
What to Do in an Emergency
- Tell your guide immediately. The guide contacts Nepal Trip Services and the insurer’s assistance line
- Provide your policy number, passport details and location
- Follow the medical and evacuation advice from the guide and the insurer
- Keep receipts, medical reports and contact details for any claim
- Notify the insurer as soon as it is safe to do so
Helicopter flights depend on weather and visibility, so delays are possible. Acting early improves safety.
What Nepal Trip Services Needs From You
Before the trek, we ask for:
- Insurance company name and policy number
- The 24-hour emergency assistance number
- Confirmation of the altitude and evacuation cover
- Your emergency contact details
Quick Checklist
- Covers trekking to at least 5,000 m
- Includes helicopter evacuation and medical expenses
- Covers trip cancellation and baggage
- Declares pre-existing conditions
- Has a 24-hour assistance number
- Printed and digital copies packed
Emergency Evacuation and Safety Measures
The Jugal Himal Base Camp Trek is remote. The road ends at Tembathang, mobile coverage is patchy, and the upper camps are a full day or more from help on foot. A clear emergency plan, an experienced guide and proper insurance make the difference when something goes wrong.
Evacuation Options at a Glance
| Option |
When It Is Used |
Notes |
| Descent on foot |
Mild to moderate symptoms, minor injuries |
Often the fastest relief for altitude sickness, with a guide or porter alongside |
| Porter or horse-assisted descent |
Trekker cannot walk safely |
Slower, depends on terrain and available crew |
| Helicopter evacuation |
Serious illness, severe altitude sickness, major injury |
Weather and visibility dependent, needs insurance confirmation |
| Road transfer from Tembathang |
After reaching the trailhead |
Private jeep to Kathmandu or the nearest hospital (about 6 to 7 hours) |
Emergency Response Steps
- Recognize the problem early. The guide checks every trekker daily and acts on the first warning signs.
- Stop and stabilize. Rest, warmth, fluids and first aid. Do not ascend, and descend if symptoms worsen.
- Call for help. The guide contacts the Nepal Trip Services office and the insurer’s 24-hour assistance line, using a satellite phone, radio or the nearest mobile signal.
- Decide on evacuation. The guide, the office and the insurance assistance team decide between a walking descent and a helicopter, based on the patient’s condition and the weather.
- Move to safety. Descend, or wait at a safe location for the helicopter, which can usually land at open areas such as Palmothang or Ne-Pemachhal when conditions allow.
- Transfer to care. The patient is taken to a hospital in Kathmandu, with a guide or staff member accompanying where possible.
- Follow up. The office assists with hospital paperwork, insurance claims, group adjustments and onward travel.
Helicopter Evacuation: What to Know
- Weather dependent. Fog, cloud, wind and snow can ground flights, sometimes for a day or longer.
- Insurance first. Operators usually need confirmation of insurance cover or payment before flying, so keep your policy number and the assistance number ready.
- Landing sites. The pilot needs a safe, flat, open area, so the guide may move the patient to a suitable spot.
- Not a taxi. Helicopter evacuation is for genuine emergencies, and misuse can void insurance claims.
- Cost. Without insurance, a rescue can cost thousands of dollars, which is why travel insurance with evacuation cover is mandatory.
Safety Measures on the Trek
- Licensed, first-aid-trained guide who monitors your health daily
- Acclimatization schedule with a rest day at Ne-Pemachhal and a “climb high, sleep low” hike
- Flexible decision-making to delay, rest, descend or turn back for safety
- Group first-aid kit carried by the guide
- Emergency equipment: Portable oxygen, a pulse oximeter and a portable altitude chamber (Gamow bag) are recommended, depending on what Nepal Trip Services carries
- Communication device: A satellite phone or radio for areas without mobile coverage
- Safe water and food: Boiled or treated water and freshly cooked, hygienic meals
- Fixed ropes and route care on the steep section to base camp
- Weather monitoring and early starts to avoid afternoon storms
- Staff welfare: Proper clothing, shelter, food and insurance for guides and porters
Your Responsibilities
- Buy insurance covering trekking to at least 5,000 m, including helicopter evacuation
- Share your policy number and emergency contacts before the trek
- Report symptoms early, and never hide them to avoid delaying the group
- Follow your guide’s decisions on pace, route and descent
- Carry personal medicines and a basic first-aid kit
- Keep your phone, power bank and documents accessible
Communication Plan
- Mobile signal exists in some lower villages but is usually absent higher up
- Agree on check-in times with family at home, with a note that silence may simply mean no signal
- Give family the Nepal Trip Services office number and your insurer’s emergency line
- Your guide keeps contact details for local authorities, hospitals and helicopter operators
Nearest Medical Care
There are no hospitals along the trail. Basic care exists in some lower villages, and serious cases are transferred to hospitals in Kathmandu. Evacuation time depends on weather, the patient’s location and transport availability, so early action matters.
Quick Emergency Checklist
- Policy number and 24-hour assistance number
- Passport copy and emergency contacts
- Personal medicines and allergy information
- Satellite phone, radio or charged phone
- First-aid kit and emergency blanket
- Your guide’s and the office’s phone numbers
Communication, Internet and Electricity During the Trek
The Jugal Himal Base Camp Trek is remote and lightly visited, so communication and power are limited. Plan to be mostly offline from Day 3 onward and prepare your devices and family accordingly.
Availability at a Glance
| Service |
Kathmandu |
Tembathang and Chhendang |
Ne-Pemachhal, Palmothang, Base Camp |
| Mobile signal |
Reliable |
Patchy, may work in spots |
Usually none |
| Internet / Wi-Fi |
Widely available |
Rare or unreliable |
None |
| Electricity |
Reliable |
Limited, may be solar or village supply |
None |
| Charging |
Hotel and cafes |
Possible but limited, may cost extra |
Not available |
| Satellite phone / radio |
N/A |
Carried by guide (recommended) |
Carried by guide (recommended) |
Mobile Phone and SIM Cards
- Buy a Nepali SIM (Ncell or Nepal Telecom) in Kathmandu with your passport and a photo. Many airports and shops sell them.
- Coverage can appear briefly on ridges and viewpoints, but do not rely on it.
- Download offline maps (Maps.me or Gaia GPS), your documents and any music or books before leaving Kathmandu.
- Switch your phone to airplane mode or low-power mode to save battery.
Internet and Wi-Fi
- Expect no Wi-Fi at camps and at most homestays above the lower villages.
- Where it exists, it is slow and may cost extra. It is not suitable for video calls or large uploads.
- Tell colleagues and family before you leave that you will be offline, and send important messages from Kathmandu.
Electricity and Charging
- Villages may have limited solar or hydro power, but camps and higher stops have none.
- Charging, where offered, is usually paid per device or per hour, so do not count on it.
- Bring a power bank (10,000 to 20,000 mAh), ideally two for a camera and phone.
- Pack spare camera batteries, a headlamp with spare batteries and a universal adapter (Nepal uses types C, D and M, at 230 V).
- Consider a small solar charger, though cloud and cold limit its use.
Protecting Batteries in the Cold
- Cold drains batteries quickly. Keep phones, cameras and power banks inside your jacket by day and in your sleeping bag at night.
- Use airplane mode, reduce screen brightness and close unused apps.
- Carry batteries in an inside pocket on summit-approach and sunrise mornings.
Emergency Communication
- A satellite phone or radio is recommended for emergencies, and your guide should carry one. Confirm with Nepal Trip Services what is provided.
- The guide keeps contact numbers for the agency office, the insurer’s assistance line and rescue services.
- Give family the Nepal Trip Services office number and your insurance details so they know whom to contact.
- Agree on a check-in plan, with a note that silence usually means no signal and not a problem.
Tips for Staying Connected
- Message family from Kathmandu on Day 1 and Day 2, and again when you return.
- Use messaging apps with offline queueing, so messages send when a signal appears.
- Download your itinerary, permits and insurance details for offline access.
- Print copies of key documents in case your phone dies.
- Bring a notebook and a book, since downtime at camp is long without screens.
What to Pack
- Power banks (two if possible) and charging cables
- Spare camera batteries and memory cards
- Universal travel adapter
- Headlamp with spare batteries
- Waterproof pouch for electronics
- Offline maps, music and books downloaded in advance
Equipment and Packing List for Jugal Himal Base Camp Trek
The trek runs from about 1,400 m to 4,700 m, with cold nights, rocky trails and camping at higher stops. Pack for layers, not bulk. Your main bag goes with the porters, so keep it light, usually around 10 kg, and carry a daypack with the items you need during the day.
Provided by Nepal Trip Services
- Sleeping bag (rated to about -15°C) and down jacket, to be returned after the trek
- Sleeping tents, dining tent, kitchen tent, toilet tent and foam mattresses
- Cooking equipment, stoves, tables and chairs
- Group first-aid kit carried by the guide
- Duffel bag for your gear, if you need one
Clothing
| Item |
Quantity |
Notes |
| Moisture-wicking base layer tops |
2 to 3 |
Synthetic or merino, avoid cotton |
| Thermal base layer set |
1 |
For cold nights and high camps |
| Fleece or insulated mid-layer |
1 to 2 |
Main warmth layer |
| Waterproof, windproof jacket |
1 |
Hard shell with hood |
| Waterproof pants |
1 |
Pull-on over trekking pants |
| Trekking pants |
2 |
Quick-dry, comfortable |
| Shorts or light pants |
1 |
Optional, for lower sections |
| Underwear |
3 to 4 |
Quick-dry |
| Trekking socks |
4 pairs |
Wool or synthetic |
| Warm hat |
1 |
Covers ears |
| Sun hat or cap |
1 |
Brim for sun protection |
| Neck gaiter or buff |
1 to 2 |
Dust, wind and cold |
| Insulated gloves |
1 pair |
Waterproof if possible |
| Liner gloves |
1 pair |
For lighter use |
Footwear
- Waterproof trekking boots, well broken-in, with ankle support and a good grip
- Camp shoes or sandals for evenings
- Gaiters (optional), useful on moraine, wet grass or snow
- Spare laces and blister plasters
Sleeping Gear
- Sleeping bag liner (optional), adds warmth and keeps the bag clean
- Earplugs and eye mask, for light sleepers
- Inflatable pillow (optional)
Trekking Gear
- Daypack (25 to 35 L) with rain cover and a hip belt
- Trekking poles, a big help on steep, rocky descents
- Headlamp with spare batteries
- UV-protection sunglasses, category 3 or 4, since glare is strong at altitude
- Water bottles (1 to 2 L total), ideally insulated or kept inside your jacket in cold weather
- Water purification tablets, filter or UV purifier
- Dry bags or waterproof liners for clothing and electronics
- Microspikes (optional), depending on season and snow conditions
Personal Items
- Documents: Passport, visa, travel insurance, permit copies, passport photos and emergency contacts (keep copies separate from originals)
- Cash: Small notes for tips, tea, snacks and charging, as there are no ATMs on the trail
- Toiletries: Biodegradable soap, toothbrush, toothpaste, quick-dry towel, toilet paper, hand sanitizer and wet wipes
- Sun protection: SPF 50+ sunscreen and SPF lip balm
- Personal first-aid kit: Pain relievers, rehydration salts, stomach medicine, blister plasters, bandages, antiseptic and any personal medicines
- Altitude medication, if recommended by your doctor
- Snacks: Nuts, chocolate and energy bars for long days
- Electronics: Phone, camera, power bank (10,000 to 20,000 mAh), spare batteries and charging cables
- Entertainment: Book, notebook or playing cards for downtime
Optional Extras
- Trekking umbrella for rain or sun
- Small trowel and zip bags for waste (leave-no-trace)
- Lightweight camp towel and sleeping mat repair patch
- Insulated flask for hot drinks
- Solar charger (limited use in cloud and cold)
What to Leave in Kathmandu
- Excess clothing, valuables and laptops
- City clothes and extra shoes
- Anything you will not need on the trail
Most Kathmandu hotels will store a bag for you at no or low cost during the trek.
Packing Tips
- Pack in layers. Several light layers handle changing temperatures better than one heavy jacket.
- Keep your daypack ready. Carry water, a rain jacket, warm layer, sunscreen, sunglasses, snacks, camera, first-aid items and documents.
- Waterproof everything. Use dry bags inside your duffel to protect gear from rain and river crossings.
- Break in your boots well before the trek to avoid blisters.
- Weigh your duffel. Keep to the porter limit, usually around 10 kg per trekker.
- Label your bags clearly with your name and trip.
Where to Buy or Rent in Kathmandu
Thamel has many shops where you can buy or rent jackets, boots, poles, gloves and bags at reasonable prices. Quality varies, so inspect gear carefully, and avoid buying brand-new boots right before the trek.
Quick Checklist
- Clothing layers and waterproofs
- Broken-in boots and camp shoes
- Sleeping bag (provided) and liner
- Daypack, poles, headlamp and sunglasses
- Water bottles and purification
- Documents, cash and insurance
- Toiletries and first-aid kit
- Power bank, camera and adapters
Physical Fitness and Training Tips
The Jugal Himal Base Camp Trek is rated moderate to challenging. You walk about 3 to 7 hours a day for 8 days, climb to 4,700 m, and descend on steep, rocky trails with a daypack on your back. Good fitness will not prevent altitude sickness, but it makes every day easier and safer and leaves you energy to enjoy the scenery.
Fitness Level Needed
| Factor |
What to Expect |
| Daily walking |
3 to 7 hours, with the longest days on Day 4 and Day 8 |
| Altitude gain |
Up to about 865 m in a single day (Day 4) and about 800 m on Day 7 |
| Terrain |
Steep forest paths, loose rock, moraine and fixed-rope sections |
| Pack weight |
Daypack of about 5 to 8 kg, with the main bag carried by porters |
| Recommended level |
Good general fitness and some multi-day trekking experience |
If you can comfortably hike 5 to 6 hours with a loaded daypack on hilly terrain, you are close to the right level.
When to Start
- Ideal: 8 to 12 weeks before departure
- Minimum: 6 to 8 weeks, if you are already active
- If you are new to exercise: Start earlier, and see a doctor first
Training Plan Components
1. Cardio endurance (3 to 4 sessions a week)
- Running, brisk walking, cycling, swimming or stair climbing
- Build from 30 to 45 minutes up to 60 to 90 minutes
- Mix steady sessions with one longer session each week
- Aim to raise your heart rate with some uphill or interval work
2. Hill and stair walking (1 to 2 sessions a week)
- Walk uphill or use stairs with a loaded backpack
- Build toward 2 to 3 hours of continuous climbing and descending
- Train the downhill too, since steep descents strain knees and thighs
3. Strength training (2 sessions a week)
- Legs: Squats, lunges, step-ups, calf raises and wall sits
- Core and back: Planks, bridges, back extensions and bird-dogs
- Upper body: Light rows and shoulder work for pack and pole comfort
- Focus on controlled movements and gradual progress
4. Long hikes with a pack (once a week, increasing)
- Start with 2 to 3 hours and build to 5 to 6 hours
- Gradually raise pack weight to about 6 to 8 kg
- Wear the boots, socks and layers you plan to use on the trek
- Practice eating, drinking and pacing as you would on the trail
5. Back-to-back days (in the final 3 to 4 weeks)
- Do long hikes on two consecutive days to mimic trek fatigue
- This builds the stamina to keep walking when your legs are tired
6. Balance, flexibility and recovery
- Stretch your calves, hamstrings, hips and back after each session
- Add balance work (single-leg stands) to prepare for uneven ground
- Schedule one or two rest days a week and sleep well
Sample Weekly Schedule (Weeks 5 to 8)
| Day |
Session |
| Monday |
Strength training (legs and core) |
| Tuesday |
45 to 60 min cardio |
| Wednesday |
Rest or gentle stretching |
| Thursday |
Stair or hill session with pack |
| Friday |
Strength training or yoga |
| Saturday |
Long hike (4 to 6 hours) with loaded pack |
| Sunday |
Easy walk, or a second shorter hike |
Adjust the plan to your starting fitness, and reduce volume if you feel pain or fatigue.
Training Tips
- Practice the pace you will use on the trek. Slow and steady is better than fast and tired.
- Break in your boots. Wear them for every long hike to prevent blisters.
- Train with trekking poles so your technique is ready for steep descents.
- Increase load gradually. Raise distance, elevation or weight by about 10% per week at most.
- Practice hydration and nutrition. Drink regularly, and eat snacks during long hikes.
- Train in varied weather where safe, so cold and rain are not a shock.
- Include mental training. Long days and cold nights are as much about patience as fitness.
Fitness and Altitude
Fitness does not protect you from altitude sickness. Young, fit trekkers are sometimes affected because they climb too fast. The best protection is a slow pace, plenty of water, the acclimatization day and prompt reporting of symptoms to your guide. Training mainly helps you stay comfortable, recover well and make good decisions.
Health Check Before You Go
- Visit your doctor for a check-up, especially if you have heart, lung, blood pressure, diabetes, joint or other conditions
- Ask about altitude medication and vaccinations
- Treat existing knee, ankle or back problems early
- Have a dental check-up, since toothache at altitude is miserable
Common Mistakes
- Starting training too late
- Training only on flat ground
- Neglecting downhill and leg strength
- Using new, unbroken-in boots on the trek
- Overtraining and arriving tired or injured
Quick Checklist
- Regular cardio for 8 to 12 weeks
- Weekly hill or stair sessions with a pack
- Strength and core training twice a week
- Long hikes building toward 5 to 6 hours
- Boots broken in and poles tested
- Doctor’s check-up completed
Weather and Temperature by Season
The Jugal Himal region has four distinct trekking seasons. Weather changes with altitude, so lower villages are mild while Palmothang and base camp are cold, especially at night. Spring and autumn are the best seasons.
Season at a Glance
| Season |
Months |
Typical Temperature Range* |
Conditions |
Rating |
| Spring |
March to May |
About -10°C to 10°C |
Warm days, cold nights, blooming rhododendrons, occasional afternoon cloud |
Excellent |
| Monsoon |
June to August |
About 0°C to 12°C |
Heavy rain, cloudy peaks, leeches, muddy trails, landslide risk |
Not recommended |
| Autumn |
September to November |
About -10°C to 10°C |
Crisp, dry, clear skies, best mountain views |
Excellent |
| Winter |
December to February |
About -15°C to 5°C |
Very cold, snow at higher camps, short days |
Possible for experienced trekkers |
*Ranges are approximate for the higher sections of the trek and vary by altitude, year and weather.
Temperature by Altitude
| Location |
Altitude |
Day |
Night |
| Kathmandu |
1,400 m |
Mild to warm |
Cool |
| Tembathang |
2,200 m |
Mild |
Cool |
| Chhendang |
2,635 m |
Mild to cool |
Cold at night in cooler months |
| Ne-Pemachhal |
3,500 m |
Cool |
Near or below freezing |
| Palmothang |
3,900 m |
Cool to cold |
Below freezing |
| Base Camp |
4,700 m |
Cold, strong sun |
Well below freezing |
Temperatures fall by roughly 6°C for every 1,000 m of altitude gained, so base camp can feel more than 15°C colder than Tembathang.
Spring (March to May)
- Weather: Warm, sunny days with comfortable walking, and cold nights at higher camps
- Highlights: Rhododendrons and wildflowers in bloom, long daylight hours and clear morning views
- Watch for: Afternoon clouds, occasional showers and late-season snow at higher elevations in March
- Best for: Color, flowers and warm days. April and May are the most popular months
Monsoon (June to August)
- Weather: Frequent heavy rain, clouds covering the peaks and high humidity
- Challenges: Slippery, muddy trails, leeches in forests, swollen streams and a high risk of landslides on the access road
- Highlights: Lush green scenery and pilgrim festivals at nearby sacred lakes in August
- Verdict: Not recommended for this trek because of safety, poor visibility and road disruption
Autumn (September to November)
- Weather: Dry, crisp air, stable conditions and the clearest skies of the year
- Highlights: Excellent mountain views, comfortable daytime walking and well-defined trails after the rains
- Watch for: Very cold nights above 3,500 m, particularly in November
- Best for: Photography and reliable weather. It is also the busiest period, so book early
Winter (December to February)
- Weather: Very cold, with snow and ice at Palmothang and base camp, short days and strong winds
- Highlights: Clear skies on good days, empty trails and peace
- Challenges: Possible trail closures, frozen water and heavy snow that can block the route
- Verdict: Suitable only for well-equipped, experienced trekkers with a flexible schedule
Daily Weather Pattern
- Mornings: Usually clear and calm, the best time for views and photography
- Midday: Warming up, with the sun feeling strong at altitude
- Afternoon: Clouds often build, and wind or light rain can arrive
- Evening and night: Temperatures drop quickly after sunset
Start early each day to make the most of clear morning weather.
What to Wear by Season
| Season |
Key Clothing |
| Spring |
Light layers by day, warm down jacket and thermal layers for nights, rain jacket |
| Autumn |
Similar to spring, with extra warmth for very cold nights in November |
| Winter |
Heavy down jacket, thermal layers, insulated gloves, warm hat, gaiters, microspikes |
| Monsoon |
Waterproofs, quick-dry clothes, leech socks and extra dry bags (not recommended) |
Weather Risks and Safety
- Rapid changes: Mountain weather can shift within an hour, so carry warm and waterproof layers every day
- Snow and ice: Possible at higher camps outside the main seasons
- Strong sun: UV is intense at altitude, so use sunscreen, sunglasses and a hat
- Delays: Weather can delay transport, helicopter evacuation and base camp access, so a buffer day is wise
Best Time to Go
For the best mix of clear views and stable weather, choose April to May for flowers and warm days, or late October to November for the clearest skies.
Solo vs Group Trek: Which Is Better?
Both options work well on the Jugal Himal Base Camp Trek, and neither is “better” for everyone. A guide is required on this route, so even a solo trekker is never walking alone: you travel with a licensed guide, a cook and porters. The real choice is between a private solo trip and sharing the trip with others.
At a Glance
| Factor |
Solo (1 Person) |
Small Group (2 to 6) |
Larger Group (7 to 10) |
| Price per person |
US$1,390 |
US$1,090 (2 people), US$925 (3 to 6) |
US$850 |
| Pace |
Fully your own |
Shared, some flexibility |
Set by the slowest member |
| Flexibility |
Highest |
Good |
Limited |
| Social experience |
Quiet, one-to-one with guide |
Friendly, shared experiences |
Lively, more social |
| Guide attention |
Full attention |
Good |
Shared, often with an assistant guide |
| Safety backup |
Guide and crew only |
Companions plus guide |
Companions plus guide and assistant |
| Best for |
Independent travelers, photographers |
Couples, friends, families |
Clubs, organized groups |
Prices come from the Nepal Trip Services trip page, so confirm current rates when booking.
Solo Trek
Advantages
- Fully flexible pace, rest stops and photography time
- Private, personal attention from your guide
- Easier to customize dates, extra days and route options
- Quiet, reflective experience in a remote place
Disadvantages
- Highest cost per person, since staff and logistics are not shared
- No companions to share the experience or the difficult days
- Less social, with long evenings at camp
- Everything depends on your own condition, so a slow acclimatization has no one else to compare with
Best for: Experienced trekkers, photographers, writers and anyone who wants privacy and control.
Group Trek
Advantages
- Much lower cost per person, as shown in the price table
- Shared experience, company and motivation on tough days
- More people to watch out for each other
- Easier to meet fellow travelers and share stories
Disadvantages
- You walk at the group’s pace, which may feel too fast or too slow
- Less flexibility for changes to dates or route
- Altitude problems for one member can affect the schedule for all
- Group dynamics and personalities matter
Best for: Couples, friends, families, first-time high-altitude trekkers and budget-conscious travelers.
Safety Comparison
The trek is remote, so safety depends mainly on the quality of the guide, the acclimatization schedule and good insurance, whether you travel solo or in a group. In a group, others can notice if you are unwell, and an assistant guide can accompany someone who needs to descend without ending the trip for everyone. Solo trekkers should be extra disciplined about reporting symptoms early, carry reliable communication and confirm that evacuation cover is in place.
Cost Comparison
| Group Size |
Price Per Person |
Saving vs Solo |
| Solo |
US$1,390 |
N/A |
| 2 people |
US$1,090 |
US$300 each |
| 3 to 6 people |
US$925 |
US$465 each |
| 7 to 10 people |
US$850 |
US$540 each |
Staff, jeep, camping equipment and permits are shared across the group, so each additional traveler lowers the cost for everyone.
Which Should You Choose?
- Choose solo if you value flexibility, privacy and a personal pace, and you are comfortable paying more.
- Choose a pair or small group for the best balance of price, flexibility and company. Two to six people is often the sweet spot.
- Choose a larger group for the lowest cost and a social atmosphere, if you are happy to follow a shared schedule.
Joining a Group as a Solo Traveler
If you are on your own but want to save money, ask Nepal Trip Services whether a group departure is planned on your dates. Joining other travelers can bring you into a lower price category and add companionship without losing the guided safety support.
Tips for Either Option
- Book early, especially for spring and autumn
- Match fitness levels within a group to avoid delays
- Agree on acclimatization rules, pace and decision-making before departure
- Share insurance details, emergency contacts and medical information with your guide
- Ask about a buffer day, since weather and altitude can change plans for any group size
Jugal Himal vs Langtang vs Helambu Trek
All three treks start from Kathmandu by road and need no flights, so they are popular for trekkers with limited time. They differ mainly in altitude, facilities, crowds and the kind of adventure they offer.
Comparison at a Glance
| Feature |
Jugal Himal Base Camp |
Langtang Valley |
Helambu |
| Typical duration |
11 days |
About 9 to 10 days |
About 5 to 8 days |
| Maximum altitude |
About 4,700 m |
About 3,870 m at Kyanjin Gompa (side hikes reach about 4,700 to 5,000 m) |
About 3,600 to 3,700 m |
| Difficulty |
Moderate to challenging |
Moderate |
Easy to moderate |
| Crowds |
Very few trekkers |
Moderate to busy in peak seasons |
Light to moderate |
| Accommodation |
Homestay and tented camping |
Teahouses throughout |
Teahouses and lodges |
| Facilities |
Basic, limited charging, no Wi-Fi |
Well developed, with food choice and some charging |
Developed on the main route |
| Trail character |
Remote, rugged, less marked |
Established, clear trail |
Clear, easy trail |
| Main highlights |
Glacier base camp, sacred Ne-Pemachhal, Dorje Lakpa and Phurbi Chyachu |
Langtang Lirung, Kyanjin Gompa, glaciers, Tamang culture |
Sherpa (Hyolmo) villages, forests, ridge views, monasteries |
| Road access |
Rough road to Tembathang, 6 to 7 hours |
Road to Syabrubesi, about 7 to 8 hours |
Short drive to the trailhead |
| Best for |
Adventurous, fit trekkers seeking solitude |
Classic Himalayan valley trek with good support |
Short, gentle, cultural treks and first-timers |
| Price on our site |
From about US$850 to 1,390 (group dependent) |
About US$650 to 700 (9 days) |
Contact for a quote |
Trek lengths, altitudes and prices vary by operator and route, so treat the figures as a guide.
Jugal Himal Base Camp Trek
- Character: Remote, wild and lightly visited, with a real expedition feel
- Highlights: A glacier-side base camp, the sacred valley of Ne-Pemachhal, the Tongsuf Cave, and views of Dorje Lakpa and Phurbi Chyachu
- Challenges: Steep climbs, rocky terrain, fixed-rope sections, cold camping, and limited communication
- Who it suits: Fit trekkers with some experience who want solitude and a true base camp challenge close to Kathmandu
Langtang Valley Trek
- Character: A classic valley trek with strong teahouse support and clear trails
- Highlights: Views of Langtang Lirung and the surrounding range, Kyanjin Gompa, yak pastures, cheese-making and Tamang culture
- Extras: Optional side hikes to Kyanjin Ri and Tserko Ri give high-altitude views without technical climbing
- Challenges: Steady altitude gain over several days, and busier trails in spring and autumn
- Who it suits: Trekkers who want a well-supported route with spectacular mountain scenery and cultural variety
Helambu Trek
- Character: A short, gentle trek through forests and villages close to Kathmandu
- Highlights: Hyolmo (Helambu Sherpa) culture, monasteries, rhododendron forests and long ridge views
- Challenges: Fewer big mountain views from the highest points, with views less dramatic than in Langtang or Jugal Himal
- Who it suits: First-time trekkers, families, shorter schedules and those who want culture over altitude
Which Trek Should You Choose?
| If You Want... |
Choose |
| A glacier base camp and real wilderness |
Jugal Himal |
| Maximum solitude and few other trekkers |
Jugal Himal |
| Comfortable teahouses and a clear, well-supported trail |
Langtang Valley |
| Big mountain views with moderate difficulty |
Langtang Valley |
| The shortest, easiest option near Kathmandu |
Helambu |
| A cultural, low-altitude trek for beginners |
Helambu |
| To avoid altitude issues |
Helambu |
| A trek that suits limited fitness or experience |
Helambu or Langtang |
Season and Weather
All three treks are best in spring (March to May) and autumn (September to November). Helambu is the most forgiving in winter because of its lower altitude, while Jugal Himal and the upper sections of Langtang are cold and snowy in winter. The monsoon (June to August) brings rain, leeches and landslide risk on all three.
Permits and Logistics
- Jugal Himal: Requires a guide, with permits arranged through a registered agency. Confirm the exact permits and fees with Nepal Trip Services.
- Langtang: Requires a national park entry permit and trekking registration, and independent trekking rules should be checked at the time of travel.
- Helambu: Uses national park entry for part of the route, with simple logistics.
Permit rules and fees change, so confirm current requirements before booking any of these treks.
Quick Summary
Choose Jugal Himal for adventure and solitude, Langtang for classic Himalayan scenery with good support, and Helambu for an easy, cultural getaway. If you have 11 days and want a challenge that most trekkers never experience, Jugal Himal is the standout.
Jugal Himal Base Camp vs Other Base Camp Treks in Nepal
I tried to pull the Everest and Annapurna details from the Nepal Trip Services site, but those pages could not be fetched, so the comparison below uses widely published figures for the other treks. Altitudes, durations and prices vary by operator and season, so confirm them against your own packages before publishing.
Comparison at a Glance
| Feature |
Jugal Himal Base Camp |
Everest Base Camp |
Annapurna Base Camp |
Mardi Himal Base Camp |
Kanchenjunga Base Camp |
| Typical duration |
11 days |
12 to 14 days |
9 to 13 days |
5 to 9 days |
20+ days |
| Highest point |
About 4,700 m |
About 5,364 m (Kala Patthar about 5,550 m) |
About 4,130 m |
About 4,500 m |
About 5,140 m (north) |
| Difficulty |
Moderate to challenging |
Moderate to challenging |
Moderate |
Easy to moderate |
Challenging |
| Crowds |
Very few |
Very busy in peak season |
Busy |
Moderate |
Very few |
| Getting there |
Road from Kathmandu, 6 to 7 hours |
Flight to Lukla, or road and flight combination |
Road or flight to Pokhara, then road |
Road or flight to Pokhara, then road |
Flight east, then long road and trail |
| Accommodation |
Homestay and tented camping |
Teahouses |
Teahouses |
Teahouses |
Teahouses and camping |
| Facilities |
Basic |
Well developed, with Wi-Fi and charging |
Well developed |
Developed |
Basic |
| Main highlight |
Glacier base camp, sacred valley, no crowds |
Everest views, Sherpa culture, Khumbu Glacier |
Annapurna sanctuary amphitheatre |
Ridge views of Machhapuchhre and Annapurna |
Remote wilderness beneath the third-highest mountain |
| Typical price range |
About US$850 to 1,390 (Nepal Trip Services) |
About US$1,200 to 2,500 depending on operator |
Varies, often about US$800 to 1,500 |
Varies, often lower |
Higher, because of length and logistics |
What Makes Jugal Himal Different
- Nearest to Kathmandu: No domestic flight is needed, and the trailhead is one day by road. Everest trekkers often face flight delays at Lukla.
- Solitude: You may see few other trekkers, while Everest and Annapurna trails can be crowded in spring and autumn.
- Real glacier base camp: You walk beside the Jugal Glacier to a base camp surrounded by ice and peaks, with a quiet expedition feel.
- Sacred, cultural landscape: Ne-Pemachhal, the Tongsuf Cave and Sherpa and Tamang villages add a spiritual layer.
- Simpler facilities: Fewer lodges, no Wi-Fi at camps and tented accommodation above the villages. This suits adventurers, but not everyone.
How It Compares, Trek by Trek
Everest Base Camp (EBC)
- Bigger altitude, bigger views and a world-famous goal
- Well-supported teahouse route, but busy, with more cost and flight uncertainty
- Higher altitude requires more acclimatization time
- Choose it for the iconic destination, or choose Jugal Himal for solitude and a shorter, road-based trip
Annapurna Base Camp (ABC)
- Dramatic sanctuary surrounded by high peaks, with excellent teahouse infrastructure
- Lower altitude than Jugal Himal, making it a gentler option
- Popular and often crowded, with many steps on the route
- Choose it for comfort and variety, or Jugal Himal for a wilder, quieter experience
Mardi Himal Base Camp
- Shorter, easier and cheaper, with superb ridge views
- Lower and less remote, and good for first-time trekkers
- Choose it for a short, accessible trek, or Jugal Himal if you want a stronger, more remote challenge
Kanchenjunga Base Camp
- One of Nepal’s most remote and rewarding long treks, with very few visitors
- Much longer, more expensive and more demanding in logistics
- Choose it for a major expedition-style trek, or Jugal Himal for a compact version of remote wilderness
Which Base Camp Is Right for You?
| If You Want... |
Choose |
| The most iconic goal and biggest mountain views |
Everest Base Camp |
| A classic mountain amphitheatre with good facilities |
Annapurna Base Camp |
| A short, easy trek with ridge views |
Mardi Himal Base Camp |
| A remote, long wilderness expedition |
Kanchenjunga Base Camp |
| An off-the-beaten-path glacier base camp close to Kathmandu, without flights |
Jugal Himal Base Camp |
| Few crowds and a low-cost, 11-day schedule |
Jugal Himal Base Camp |
Permits and Logistics
- Jugal Himal: Requires a guide, with permits arranged through your agency
- Everest and Annapurna: Require national park or conservation area entry permits and local fees, with rules and costs that change, so check current requirements
- Remote treks (Kanchenjunga): Usually require special permits and a registered agency
Altitude and Difficulty
Jugal Himal reaches about 4,700 m, which is higher than ABC and close to Mardi Himal, but lower than EBC and Kanchenjunga. Its compact 11-day schedule means less time to adjust, so the altitude gain can feel sharper than the numbers suggest. Good fitness and respect for acclimatization matter on every one of these treks.
Best Season
All of these treks are best in spring (March to May) and autumn (September to November). Mardi Himal and parts of Annapurna can be done in winter with care, while the Jugal Himal base camp area is very cold and snowy.
Quick Summary
Choose Jugal Himal for solitude, a short road-based approach and a genuine glacier base camp close to Kathmandu. Choose Everest for the dream destination, Annapurna for comfort and scenery, Mardi Himal for an easy short trek and Kanchenjunga for a long wilderness expedition.
Why Choose the Jugal Himal Trek: Off-the-Beaten-Path Adventure
The Jugal Himal Base Camp Trek is for trekkers who want a real Himalayan adventure without the crowds. It combines glacier scenery, sacred sites and village culture in a quiet corner of Nepal, just one road journey from Kathmandu.
Top Reasons to Choose This Trek
1. Genuinely off the beaten path
The trails see far fewer trekkers than Everest, Annapurna or Langtang. Expect quiet paths, open valleys and nights under clear skies, where the loudest sounds are rivers and prayer flags.
2. A true glacier base camp
You walk beside the Jugal Glacier to Jugal Himal Base Camp at about 4,700 m, surrounded by ice walls and high peaks. It feels like an expedition without the technical climbing.
3. Close to Kathmandu, with no flights
The trailhead at Tembathang is a 6 to 7 hour drive from the capital. There are no Lukla-style flight delays, and no long approach days.
4. Spectacular mountain scenery
See Dorje Lakpa, Phurbi Chyachu and the Jugal Glacier up close, with panoramic views from the Gyap Kharka viewpoint and sunrise light on the peaks from camp.
5. A sacred, cultural landscape
Visit Ne-Pemachhal, the hidden valley linked to Guru Rinpoche, and the Tongsuf Cave. Pass Sherpa and Tamang villages, mani walls, chortens and prayer flags in a region where traditions are still part of daily life.
6. A compact 11-day schedule
Enough time to experience real wilderness, with a built-in acclimatization day, but short enough to fit into a two-week holiday.
7. Excellent value
Group prices start from about US$850 per person, and a 2-person trip is US$1,090 (US$1,390 solo), with permits, meals, guide, porters, camping gear and transport included. Compare that with the cost and crowds of better-known base camp treks.
8. Authentic homestay and camping experience
Stay in local homes in the villages and in tents at the higher camps, with freshly cooked meals and warm hospitality. Your trip supports families in a lightly visited region.
9. A balance of challenge and accessibility
It is non-technical and does not need climbing skills, but it is demanding enough to feel rewarding. Fit trekkers with some multi-day experience can succeed with good preparation.
10. Safety and support
A licensed guide, trek cook, porters and camp crew look after you, so you can concentrate on the walking and the scenery.
What Sets It Apart
| Feature |
Jugal Himal |
Popular Routes |
| Crowds |
Very few trekkers |
Busy in spring and autumn |
| Access |
One road journey from Kathmandu |
Often flights or long drives |
| Experience |
Wild, quiet, expedition-like |
Developed, social, well-marked |
| Culture |
Sherpa and Tamang villages, sacred sites |
Varied, but busier and more commercial |
| Price |
From about US$850 per person in a group |
Often higher |
Who Will Love It
- Trekkers who want solitude and untouched landscapes
- Photographers and nature lovers
- Cultural travelers interested in Himalayan traditions
- Repeat visitors to Nepal who have done the classics
- Fit first-time high-altitude trekkers who prepare well
Things to Be Ready For
- Basic facilities, with homestay and tented camping rather than lodges at higher stops
- Limited charging, little or no mobile signal and no Wi-Fi at camps
- Cold nights and some steep, rocky sections, including short fixed-rope stretches
- A compact schedule, so fitness and acclimatization discipline matter
If those trade-offs suit you, this trek rewards you with quiet trails, big scenery and an experience few trekkers have had.
The Bottom Line
Choose the Jugal Himal Base Camp Trek if you want a remote, rewarding Himalayan journey that is accessible, affordable and refreshingly uncrowded. It is one of the few places in Nepal where you can reach a glacier base camp in 11 days and still feel like an explorer.
Short Treks Near Kathmandu: Top Alternatives
If you cannot do the Jugal Himal Base Camp Trek, or want to pair it with an easier option, Nepal has several short treks that start by road from Kathmandu. Durations, altitudes and prices below are typical figures and vary by operator, so confirm them before publishing.
Comparison at a Glance
| Trek |
Typical Duration |
Highest Point |
Difficulty |
Getting There |
Best For |
| Jugal Himal Base Camp |
11 days |
About 4,700 m |
Moderate to challenging |
Road, 6 to 7 hrs |
Glaciers, solitude, adventure |
| Langtang Valley |
7 to 10 days |
About 3,870 m (Kyanjin Gompa), higher with side hikes |
Moderate |
Road to Syabrubesi, 7 to 8 hrs |
Mountain views, Tamang culture |
| Helambu Circuit |
5 to 8 days |
About 3,600 to 3,700 m |
Easy to moderate |
Short road transfer |
Forest, Hyolmo culture, beginners |
| Gosainkunda Lake |
6 to 9 days |
About 4,380 m |
Moderate to challenging |
Road to Dhunche or Sundarijal |
Sacred lakes, pilgrimage |
| Panch Pokhari |
7 to 10 days |
About 4,050 m |
Moderate |
Road to the Sindhupalchok trailhead |
Sacred lakes, quiet trails |
| Chisapani–Nagarkot |
2 to 4 days |
About 2,200 m |
Easy |
Very short transfer |
Weekend trip, valley views |
| Ama Yangri Peak |
3 to 4 days |
About 3,771 m |
Easy to moderate |
Short road transfer |
Wide Himalayan panorama, quick escape |
| Pikey Peak |
About 7 days |
About 4,065 m |
Easy to moderate |
Road or flight to Solukhumbu |
Everest views without the crowds |
Top Alternatives in Detail
1. Langtang Valley Trek
A classic short trek in a glaciated valley, with yak pastures, cheese-making and Tamang culture. Kyanjin Gompa is the main destination, and optional side hikes reach higher viewpoints. Teahouse facilities are well developed, making it a good step up from Helambu.
- Choose it for: Big views, clear trails and strong infrastructure
- Compared with Jugal Himal: Easier, more social and better supported, but busier
2. Helambu Circuit
A gentle trek through rhododendron forests and Hyolmo (Helambu Sherpa) villages, with monasteries and long ridge views. Close to Kathmandu, with a short transfer and low altitude.
- Choose it for: First-time trekking, culture and easy walking
- Compared with Jugal Himal: Much lower and gentler, with fewer big mountain views
3. Gosainkunda Lake Trek
A pilgrimage trek to a high alpine lake, sacred to Hindus, with a spiritual atmosphere and strong scenery. It involves steady climbing and altitude, so it demands more than Helambu.
- Choose it for: Sacred lakes, religious festivals and alpine scenery
- Compared with Jugal Himal: Similar spiritual character, but a more established route
4. Panch Pokhari Trek
A quieter route to five sacred lakes in Sindhupalchok, close to the Jugal Himal area. It links well to a longer Jugal Himal extension.
- Choose it for: Pilgrim trails, meadows and fewer crowds
- Compared with Jugal Himal: Lower altitude and no glacier base camp, but similar solitude
5. Chisapani–Nagarkot Trek
A short walk along the northern rim of the Kathmandu Valley, with sunrise views of the Himalaya, forests and villages. Ideal as a weekend break or a warm-up.
- Choose it for: A 2 to 4 day getaway with minimal preparation
- Compared with Jugal Himal: Far gentler, with distant, not close-up, mountain views
6. Ama Yangri Peak Trek
A short ascent to a viewpoint above Helambu, famous for a wide panorama of peaks. It is a quick, budget-friendly escape with a rewarding view.
- Choose it for: A fast trek with big views and low difficulty
- Compared with Jugal Himal: Much shorter and easier, but with no base camp or glacier
7. Pikey Peak Trek
A gentle trek in the Solukhumbu region with sweeping views of Everest and neighboring giants, without the Everest Base Camp crowds. It needs a flight or a long road journey, so it is less convenient than the others.
- Choose it for: Everest views and a quiet, cultural route
- Compared with Jugal Himal: Easier and lower, with a different type of scenery
Which Short Trek Should You Choose?
| If You Want... |
Choose |
| A glacier base camp and real adventure |
Jugal Himal Base Camp |
| The best balance of views, difficulty and support |
Langtang Valley |
| The easiest, most beginner-friendly option |
Helambu or Chisapani–Nagarkot |
| Sacred lakes and a pilgrimage feel |
Gosainkunda or Panch Pokhari |
| A very quick break from the city |
Ama Yangri or Chisapani–Nagarkot |
| Everest views with fewer crowds |
Pikey Peak |
Season and Planning
- Best seasons: Spring (March to May) and autumn (September to November) for all of these treks
- Winter: Lower treks such as Helambu, Chisapani–Nagarkot and Ama Yangri can be done with care, while higher routes get cold and snowy
- Monsoon: Rain, leeches and landslide risk make most of these treks unpleasant, though pilgrimage festivals take place at the sacred lakes in August
- Permits: Many of these treks need a national park or conservation area permit and trekking registration, so confirm current requirements with your agency
- Insurance: Carry travel insurance that covers trekking at the altitude of your chosen route
Combining Treks
If you have extra time, you can pair a short, easy trek (such as Chisapani–Nagarkot) as a warm-up before Jugal Himal, or add a Panch Pokhari extension to make the trip longer and more gradual. Ask Nepal Trip Services about custom itineraries.
Responsible and Eco-Friendly Trekking Tips
The Jugal Himal region is quiet and lightly visited, with fragile alpine meadows, glacial streams and sacred sites. Small, careful choices by every trekker help keep it that way, and they directly support the Sherpa and Tamang communities who live here.
The Core Principles
| Principle |
What It Means on This Trek |
| Leave no trace |
Carry out everything you carry in, including food wrappers and used batteries |
| Respect culture |
Follow local customs at villages, mani walls and sacred sites such as Ne-Pemachhal |
| Support locals |
Use homestays, local guides and porters, and buy local products |
| Protect water and wildlife |
Keep soap, waste and food away from streams and animals |
| Care for staff |
Make sure guides and porters are fairly paid, equipped and insured |
Waste and Plastic
- Avoid single-use plastic. Bring a reusable bottle and treat water with tablets, a filter or a UV purifier instead of buying bottled water.
- Pack out all trash. Plastic, foil, batteries, tissues, sanitary products and food waste should come back to Kathmandu for proper disposal.
- Repackage food before the trek to reduce wrappers, and carry a small bag for rubbish.
- Do not burn plastic. It releases toxic fumes and harms air quality in the valleys.
- Bring reusable items, such as a cloth bag, lunch box and cutlery.
Toilets and Hygiene
- Use the camp toilet tent and village toilets whenever possible.
- If you must go outdoors, move at least 50 to 70 m from water sources, trails and campsites. Dig a small hole about 15 cm deep, cover it and pack out used toilet paper in a sealed bag.
- Wash with biodegradable soap in a basin, at least 50 m from streams, and scatter the used water widely.
- Use wet wipes sparingly, and carry them out, since they do not biodegrade.
Water, Fire and Fuel
- Camp crews should use kerosene, gas or efficient stoves, not wood fires, especially in forests and above the tree line.
- Do not cut live trees or branches, which are slow to regrow at altitude.
- Ask lodges to heat water efficiently, and use only what you need.
- Keep soap, detergent and toothpaste out of rivers, lakes and glacial streams.
Trail and Environment
- Stay on the trail to prevent erosion and protect meadows and moss.
- Do not take shortcuts across switchbacks.
- Leave rocks, plants, flowers and artifacts where you find them.
- Keep your distance from wildlife and grazing yaks. Never feed animals.
- Camp in established sites and leave them cleaner than you found them.
- Be careful near glaciers and moraine, which are fragile and unstable.
Respecting Local Culture
- Walk clockwise around mani walls, chortens and prayer wheels.
- Dress modestly and speak quietly at sacred sites such as Ne-Pemachhal and the Tongsuf Cave.
- Do not touch religious objects, prayer flags or offerings.
- Ask before photographing people, homes or ceremonies.
- Learn a few words, such as “Namaste” and “Tashi Delek.”
- Avoid giving sweets or money to children, since it can encourage begging. Donate to a school or a community project through your guide instead.
Supporting the Local Economy
- Stay in homestays and eat local meals, so more money stays with village families.
- Buy local crafts, tea and snacks directly from villagers.
- Hire local staff and pay fair prices without aggressive bargaining.
- Tip guides, porters and cooks fairly, and share group tips transparently.
- Choose an agency that pays staff properly and follows ethical porter policies.
Fair Treatment of Guides and Porters
- Make sure porters carry safe loads, usually around 20 to 25 kg or less, and are not overloaded.
- Check that staff have proper clothing, footwear, sleeping gear, food and shelter at altitude.
- Ensure they are insured and have access to medical care and evacuation.
- Treat them as team members, with respect, thanks and a fair share of tips.
Before You Go
- Choose a company that follows responsible tourism practices, and ask how Nepal Trip Services handles waste, staff welfare and community support.
- Pack light, and avoid bringing unnecessary disposable items.
- Buy gear you will reuse, and consider renting or borrowing items you rarely use.
- Learn the basic rules for conservation areas and sacred sites.
Quick Eco-Checklist
- Reusable bottle and purification method
- Biodegradable soap and zip bags for waste
- Reusable bags and food containers
- Rechargeable batteries or a power bank
- Respectful dress and an open mind
- Cash for local purchases and tips
The Bottom Line
The beauty of the Jugal Himal comes from how little it has been changed. Trek lightly, treat people with respect, and leave the trail and camps cleaner than you found them, so the next trekkers can enjoy the same quiet landscape.
Tipping Guide for Guides and Porters
Tipping is customary in Nepal’s trekking industry. Guides, cooks and porters earn modest wages, and tips are a significant part of their income. A tip is a way to say thank you for hard work, safety and good company, and it is never required to be extravagant.
How Tipping Works
- Pool the tips. Most groups collect tips from all trekkers, then hand them over together at the end of the trek.
- Tip at the end. The usual time is the farewell dinner in Kathmandu (Day 10) or at the trailhead in Tembathang.
- Use an envelope. Give each staff member their share in cash, in Nepali rupees, with a few words of thanks.
- Split fairly. The guide usually distributes the tip pool by role and days worked, or you can hand over each envelope directly.
Suggested Tip Amounts
These are common guidelines, not fixed rules. Adjust them to your group’s budget and the quality of service.
| Staff Member |
Typical Tip (Per Day) |
Approx. Total for 8 Trekking Days |
| Trekking guide |
US$10 to 15 per group per day, or about US$5 to 8 per trekker |
About US$80 to 120 per group |
| Assistant guide |
US$7 to 10 per group per day |
About US$55 to 80 per group |
| Trek cook |
US$5 to 8 per group per day |
About US$40 to 65 per group |
| Kitchen helper |
US$3 to 5 per group per day |
About US$25 to 40 per group |
| Porter |
US$5 to 8 per porter per day |
About US$40 to 65 per porter |
| Driver (jeep) |
US$10 to 20 per group for the trip |
About US$10 to 20 per group |
Amounts are rough estimates, and many trekkers choose a total budget instead.
Simple Alternative: Percentage Method
A common rule of thumb is to budget about 10 to 15 percent of the trek price as the total tip pool, then divide it among the team. For example, on a package of US$1,090 per person, that is about US$110 to 165 per trekker, which is a generous overall figure, so many trekkers tip toward the lower end of this range or follow the per-day guide above.
Sample Tip Pool: Group of 2 Trekkers
| Staff |
Number |
Estimate |
| Guide |
1 |
US$100 |
| Assistant guide (if any) |
0 to 1 |
US$0 to 65 |
| Cook |
1 |
US$50 |
| Kitchen helper |
1 |
US$30 |
| Porters |
1 |
US$50 |
| Driver |
1 |
US$15 |
| Total (group) |
|
About US$245 to 310 |
| Per trekker |
|
About US$120 to 155 |
Your exact total depends on the crew size Nepal Trip Services assigns, so ask for the actual team composition before the trek.
Tips for Tipping Well
- Carry cash. Bring Nepali rupees in small and medium notes, since there are no ATMs on the trail and US dollars may be harder to use locally.
- Ask your guide. A good guide can advise on a fair split and who is on the team.
- Reward good service. Increase the tip for exceptional care, such as help during altitude sickness or extra hard days.
- Include everyone. Do not forget the cook, helpers and the driver.
- Be discreet. Hand envelopes over privately and with thanks.
- Do not tip in place of fair wages. Choose a company that pays staff properly. Tips should supplement, not replace, a fair salary.
Other Ways to Show Appreciation
- Offer to pass on warm clothing, gloves, boots or trekking gear you no longer need, with the guide’s guidance on who needs it most
- Write a positive review mentioning your guide and crew by name
- Recommend the team to friends
- Leave a personal thank-you note
Gifts and Donations
- Avoid handing out sweets or money to village children, which can encourage begging
- If you wish to give back, donate through your guide to a local school, clinic or community fund
What Not to Do
- Do not tip in coins or very small notes only
- Do not skip tipping because “service was included,” since the package price does not cover tips
- Do not give large tips to one person while ignoring others on the team
Quick Checklist
- Know the crew size and roles before the trek
- Set aside a tip budget in cash
- Pool tips with other trekkers
- Present envelopes at the end of the trek with thanks
Nepal Visa and Entry Information
Most visitors need a tourist visa for Nepal, and it is easy to get. You can apply online before travel, or get the visa on arrival at Kathmandu’s Tribhuvan International Airport. Rules and fees can change, so check the official Department of Immigration site before you travel.
Visa Fees at a Glance
| Visa Length |
Fee (USD) |
Notes |
| 15 days |
US$30 |
Too short for the 11-day trek plus buffer days if you add sightseeing |
| 30 days |
US$50 |
Suitable for most trekkers |
| 90 days |
US$125 |
For longer stays or multiple treks |
The same fees apply whether you apply online or on arrival. Tourist visas are multiple entry. The fee is paid in cash or by card at the airport, and in US dollars or other accepted currencies at the counter.
How to Get Your Visa
Option 1: Online pre-registration (recommended)
- Visit the official Department of Immigration website (online.nepalimmigration.gov.np).
- Fill out the tourist visa form and upload a passport-style photo.
- Submit the form and print the confirmation with its barcode. Apply within about 15 days of travel.
- On arrival, pay the fee and take your documents to the immigration desk.
Option 2: Fill in on arrival
- Complete the arrival card and the visa form at the airport kiosks.
- Pay the fee at the payment counter.
- Proceed to the immigration desk with your passport, form and receipt.
Online pre-registration saves time in the queue, which can be long in peak seasons.
Option 3: Apply at a Nepali embassy or consulate
You can apply before travel through a Nepali mission in your country, following its instructions and document requirements.
What You Need
- A passport valid for at least 6 months, with at least one blank page
- A recent passport-size photo (digital for the online form, plus a spare print)
- Visa fee in cash or card
- A completed visa form (online or at the airport)
- Return or onward ticket details, if asked
New: eVisa / ETA (Electronic Travel Authorization)
A third-party guide reports that Nepal begins offering an electronic travel authorization (eVisa) from September 2026, allowing eligible travelers to apply before arrival. Because this is a recent change and sources differ, check the Department of Immigration website for the current system and eligibility before you rely on it.
Who Does Not Need a Visa, or Cannot Get One on Arrival
- Indian citizens do not need a visa to enter Nepal, though they must carry valid ID, and other special rules apply
- Some nationalities have special arrangements, so check the Department of Immigration list
- Restricted nationalities: Certain passports are not eligible for visa on arrival and must apply through an embassy in advance. For example, Iranian passport holders were noted as ineligible for visa on arrival in March 2026, so confirm your own nationality’s status
Extending Your Visa
- Extensions are possible at the Department of Immigration in Kathmandu (Maitighar) or at immigration offices in Pokhara and some other cities
- The fee is about US$3 per day, with a 15-day minimum (around US$45 for 15 days)
- The maximum stay for tourists is 150 days in one calendar year
Entry Points
- Tribhuvan International Airport, Kathmandu: Main entry for most travelers
- Pokhara International Airport: Also issues visas
- Land borders: Visas are available at major crossings, such as those with India
Entry Tips for Trekkers
- Choose a visa that covers your whole stay, including the trek, extra days in Kathmandu and any buffer days. A 30-day visa suits most 11-day treks.
- Pre-register online, and carry printed copies of your confirmation and passport.
- Keep a few US dollars in small notes for the visa fee, in case card machines are down.
- Bring spare passport photos for permits and local registrations.
- Carry your insurance details, trek permits and Nepal Trip Services contact numbers when you clear immigration.
- Arrive in Kathmandu at least a day before the trek to settle in and finish permit paperwork.
What Nepal Trip Services Handles and What You Handle
| Item |
Who Arranges It |
| Nepal tourist visa |
You (not included in the package) |
| Trekking permits and paperwork |
Nepal Trip Services (included) |
| Airport pick-up and drop-off |
Nepal Trip Services (included) |
| Travel insurance |
You (mandatory, not included) |
| International flights |
You |
Quick Checklist
- Passport valid 6+ months, with blank pages
- Visa duration chosen (30 days suggested)
- Online form submitted, and confirmation printed
- Visa fee in cash or card
- Passport photos, insurance and trek details in your daypack
Why Book with Nepal Trip Services
Nepal Trip Services is a Kathmandu-based trekking and tour operator offering treks, tours, helicopter services and adventure activities across Nepal. The points below come from the information on the company’s own website and the Jugal Himal trip page. Items marked “add” need your confirmation before publishing.
Reasons to Choose Us
1. Experience you can rely on
The website describes 16 years of excellence in Nepal travel. That experience shows in route planning, permits, safety decisions and handling the unexpected in remote areas such as the Jugal Himal.
2. Locally based, with a Kathmandu office
Our office is in Thamel, Kathmandu, so you can meet the team before the trek, ask questions in person and get support in the city where your trip starts and ends.
3. Industry-recognized and registered
The company displays its affiliations with the Nepal Tourism Board, the Trekking Agencies’ Association of Nepal (TAAN), the Nepal Mountaineering Association and the Government of Nepal, and is listed on Tripadvisor. Registered operators follow national rules for permits, guides and insurance.
4. Specialist knowledge of a rarely visited trek
The Jugal Himal Base Camp route is remote, and our 11-day itinerary is built around a proper acclimatization day at Ne-Pemachhal, careful pacing and a clear emergency plan.
5. Transparent, competitive pricing
Prices are published on the trip page, with group discounts:
| Group Size |
Price Per Person |
| 1 person |
US$1,390 |
| 2 people |
US$1,090 |
| 3 to 6 people |
US$925 |
| 7 to 10 people |
US$850 |
The price includes permits, a licensed English-speaking guide, porters, meals on the trek, camping equipment, private transport, hotel nights in Kathmandu and taxes, with no hidden extras for the listed services.
6. Safety-first planning
- Licensed, English-speaking guides
- An itinerary with an acclimatization day and a “climb high, sleep low” hike
- A group first-aid kit and an emergency plan
- Clear insurance requirements covering altitude and helicopter evacuation
7. Fast, personal communication
The trip page lists a response time of 0 to 2 hours and a 100% response rate, with direct contact by WhatsApp, Viber, phone and email. You speak to a real trip specialist, not a call center.
8. Flexible and customizable trips
Not satisfied with the standard 11-day schedule? We can add a buffer day, extend to Panch Pokhari, arrange a private departure or build a custom itinerary through our trip planner.
9. Responsible and community-friendly trekking
We use local homestays, local staff and local suppliers, so your trip supports families in the Jugal Himal region. We encourage leave-no-trace practices and fair treatment of porters and crew. (Add your actual policies, such as porter load limits, insurance and wages.)
10. Wide range of Nepal experiences
Beyond Jugal Himal, we offer Everest, Annapurna, Manaslu, Langtang and Pikey Peak treks, Nepal tour packages, helicopter tours and river rafting, so you can combine a trek with sightseeing or other adventures in one booking.
What You Get When You Book
- Airport pick-up and drop-off
- A pre-trek briefing and gear check
- Sleeping bag and down jacket (returned after the trek)
- Permit arrangement and trek paperwork
- Private jeep transport to and from the trailhead
- Freshly cooked meals, camping set-up and a trained crew
- Support from the Kathmandu office throughout the trip
How Booking Works
- Enquire by WhatsApp, phone, email or the website form with your dates and group size
- Confirm the itinerary and price with your trip specialist
- Book through the online booking page and pay the deposit
- Prepare with our packing list, insurance guidance and visa information
- Trek with a guide and crew, with the office available throughout
Elements to Add Before Publishing
These make the page stronger, but only include them if they are true and verifiable:
- Your company registration or license number
- Number of treks completed and years of Jugal Himal operations
- Guide profiles, qualifications and first-aid or wilderness training
- Real customer reviews and ratings from Tripadvisor or Google
- Cancellation, refund and payment policy
- Safety record, emergency equipment carried and evacuation procedures
- Porter welfare policy and any community or environmental projects
Quick Summary
| Reason |
What It Means for You |
| Experienced, local team |
Smooth logistics and local knowledge |
| Recognized affiliations |
Registered, regulated operator |
| Transparent pricing |
Clear group-based rates |
| Safety-focused schedule |
Acclimatization and emergency planning |
| Fast response |
Quick answers before and during booking |
| Custom options |
Itineraries that fit your time and budget |
Customize Your Jugal Himal Trek
Your trek, your way. Whether you want a shorter route, a slower pace, or a private departure, we tailor the Jugal Himal Trek to fit your schedule, fitness level, and budget.
What You Can Customize:
- Trek Duration: Choose a short 7-day trek or a longer 12-day adventure
- Group Size: Solo, couple, family, or private group departures
- Route Options: Add Langtang, Helambu, or Gosaikunda extensions
- Accommodation: Comfortable teahouses or upgraded lodges
- Travel Dates: Flexible start dates all year round
- Add-Ons: Cultural tours, Kathmandu sightseeing, or a guide-porter team
Why Customize with Us?
Our local Jugal Himal trek guides design every itinerary around you. Enjoy a peaceful, off-the-beaten-path trek near Kathmandu with fewer crowds and authentic Tamang culture.
Ready to plan your Jugal Himal trek? Contact us today for a free custom itinerary and the best price.
Booking and Payment Policy
Booking your Jugal Himal Trek is simple and secure. Follow the steps below to reserve your trip.
How to Book:
- Step 1: Choose your trek dates and send us an inquiry by email, WhatsApp, or the booking form
- Step 2: Confirm your itinerary, group size, and any customizations
- Step 3: Pay the booking deposit to secure your spot
- Step 4: Send a copy of your passport, travel insurance, and arrival details
Payment Terms:
- Booking Deposit: 20% of the total trek cost to confirm your booking
- Balance Payment: Remaining amount due on arrival in Kathmandu, before the trek begins
- Payment Methods: Bank transfer, credit/debit card (service fee may apply), or cash in USD at our Kathmandu office
- Currency: All prices are quoted in USD
Good to Know:
- Booking is confirmed only after the deposit is received
- Early booking is recommended for peak seasons (March to May and September to November)
- Group discounts are available for 4 or more trekkers
- Travel insurance with high-altitude and emergency evacuation cover is mandatory
Questions about booking your Jugal Himal trek? Contact our team today. We reply within 24 hours.